项目源码:https://github.com/woodwhales/woodwhales-study/tree/master/woodwhales-vue-demo
脚手架搭建
步骤1:全局安装 vue 2.0
1 | cnpm install vue-cli -g |
查看 vue 版本命令:
vue -V
步骤2:在一个空目录中创建工程
执行 vue 初始化工程命令:
1 | vue init webpack my-demo |
当提示到是否安装:
Install vue-router?,输入y。提示是否安装:
Use ESLint to lint your code?,输入n。其他选项全部输入
y
安装完成,提示如下信息:
1 | Project initialization finished! |
根据安装完成的提示,进入 my-demo 目录,执行npm run dev命令,浏览器访问:http://localhost:8080 地址即可看到vue-cli脚手架搭建的基础工程。
步骤3(可选):修改启动端口号
在config/index.js配置文件中,配置了项目的启动基础参数:
1 | host # 项目启动的主机名 |
创建自定义组件
在components文件目录下创建Index.vue文件:
1 | <template> |
在router/index.js文件中将Index组件引入:
1 | import Vue from 'vue' |
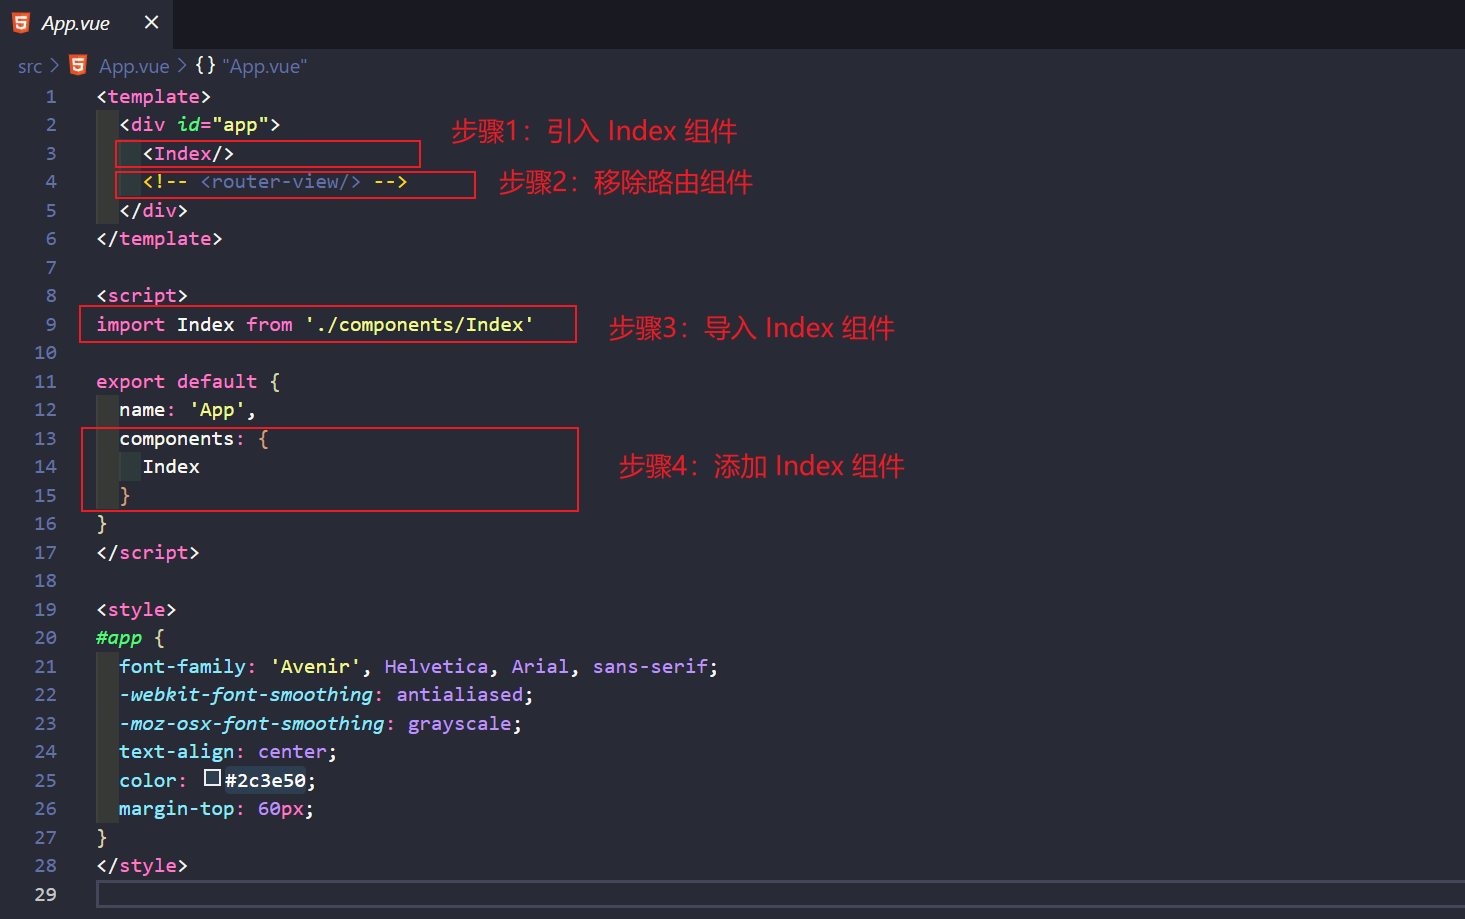
在App.vue文件中将Index组件引入:
1 | <template> |
具体改动如图:
浏览器访问项目,可以看到首页变成了Index组件中的内容:

引入 element-ui 组件
element-ui 官网:https://element.eleme.cn/#/zh-CN
停止项目,安装element-ui依赖:
1 | npm i element-ui -S |
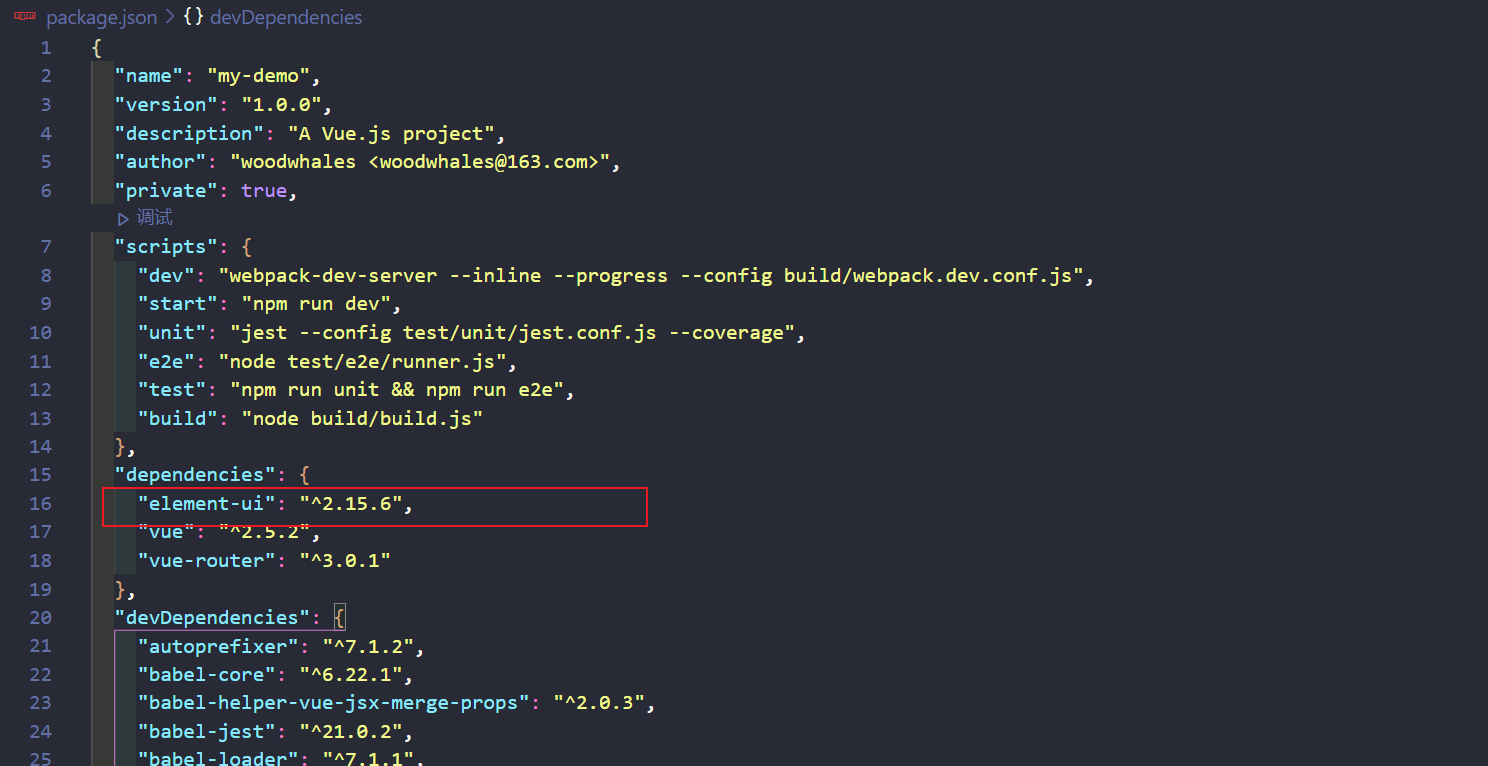
安装成功之后,检查package.json配置中是否引入了element-ui:
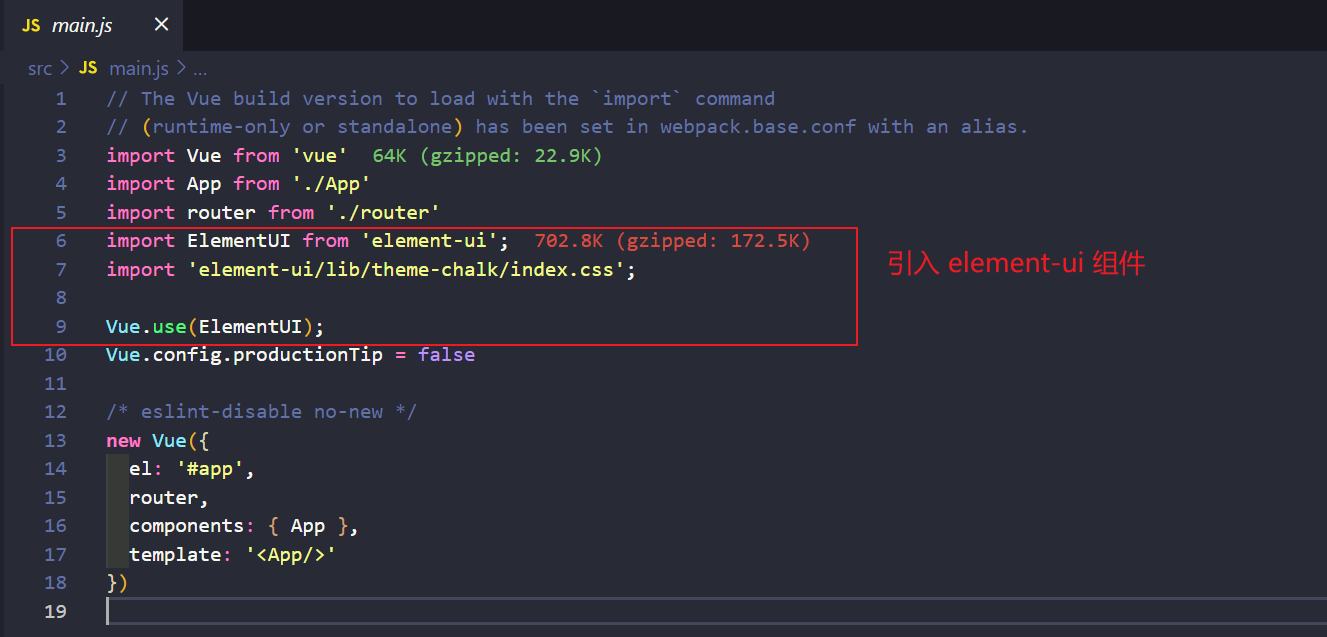
在main.js配置中引入element-ui组件:
1 | import ElementUI from 'element-ui'; |
具体改动如图:
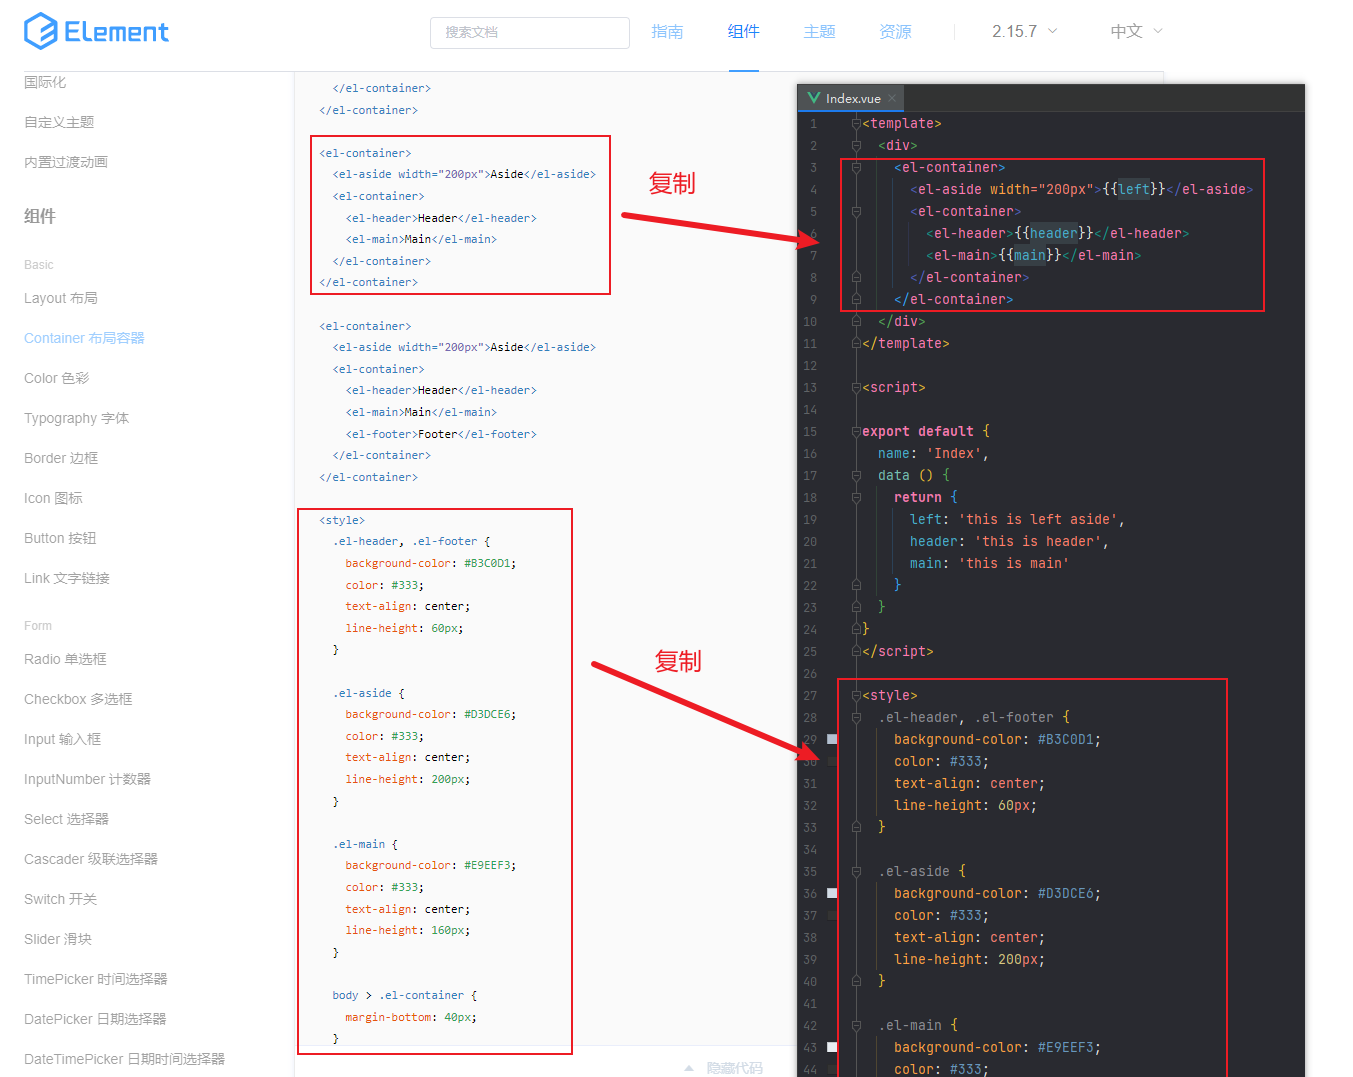
对Index.vue组件进行改造,引入 element-ui 的 Container 布局容器:
Container 布局容器:https://element.eleme.cn/#/zh-CN/component/container
1 | <template> |
具体改动如图:
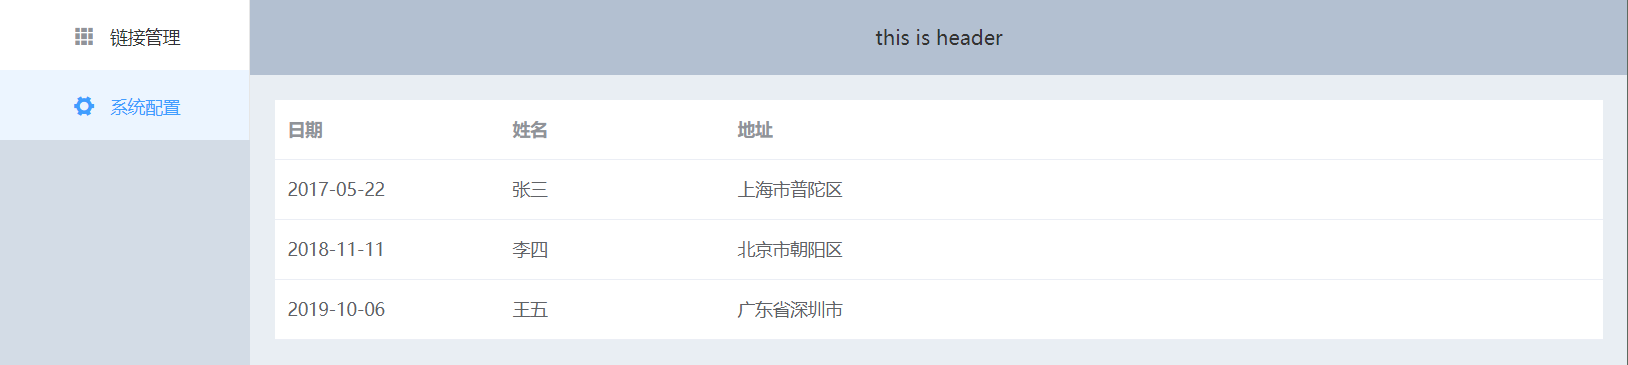
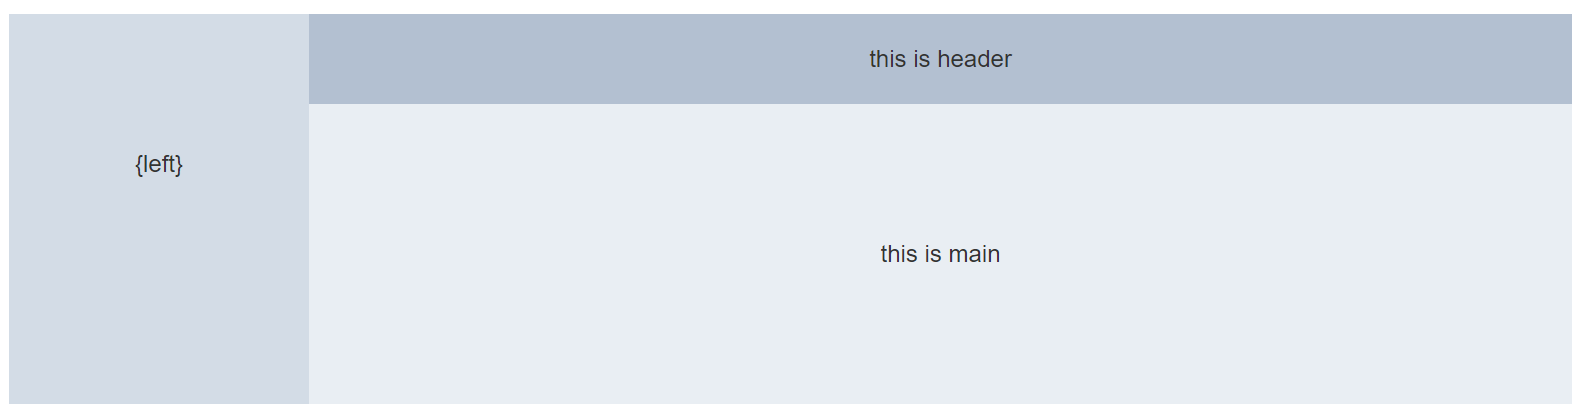
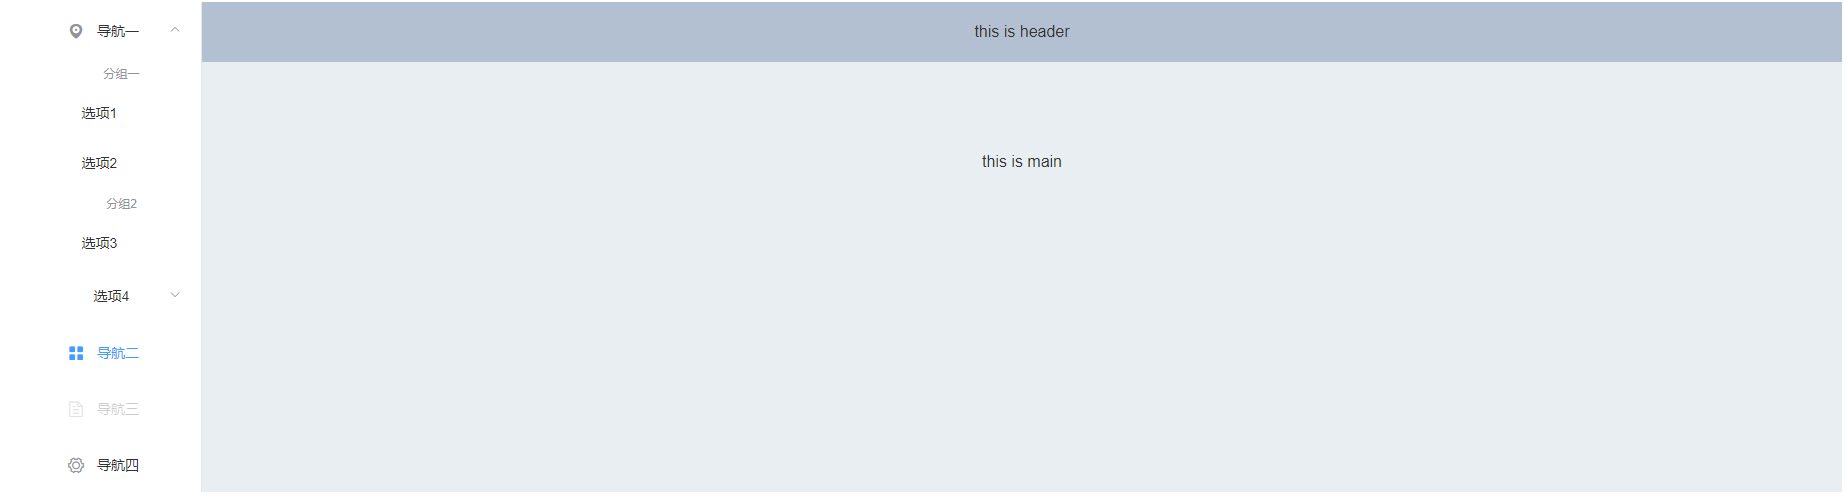
浏览器访问项目,可以看到首页变成了Index组件中的 element-ui 布局样式:
引入 element-ui 导航菜单
NavMenu 导航菜单:https://element.eleme.cn/#/zh-CN/component/menu
在Index.vue组件中的左侧栏中添加导航菜单代码:
1 | <template> |
具体改动如下:
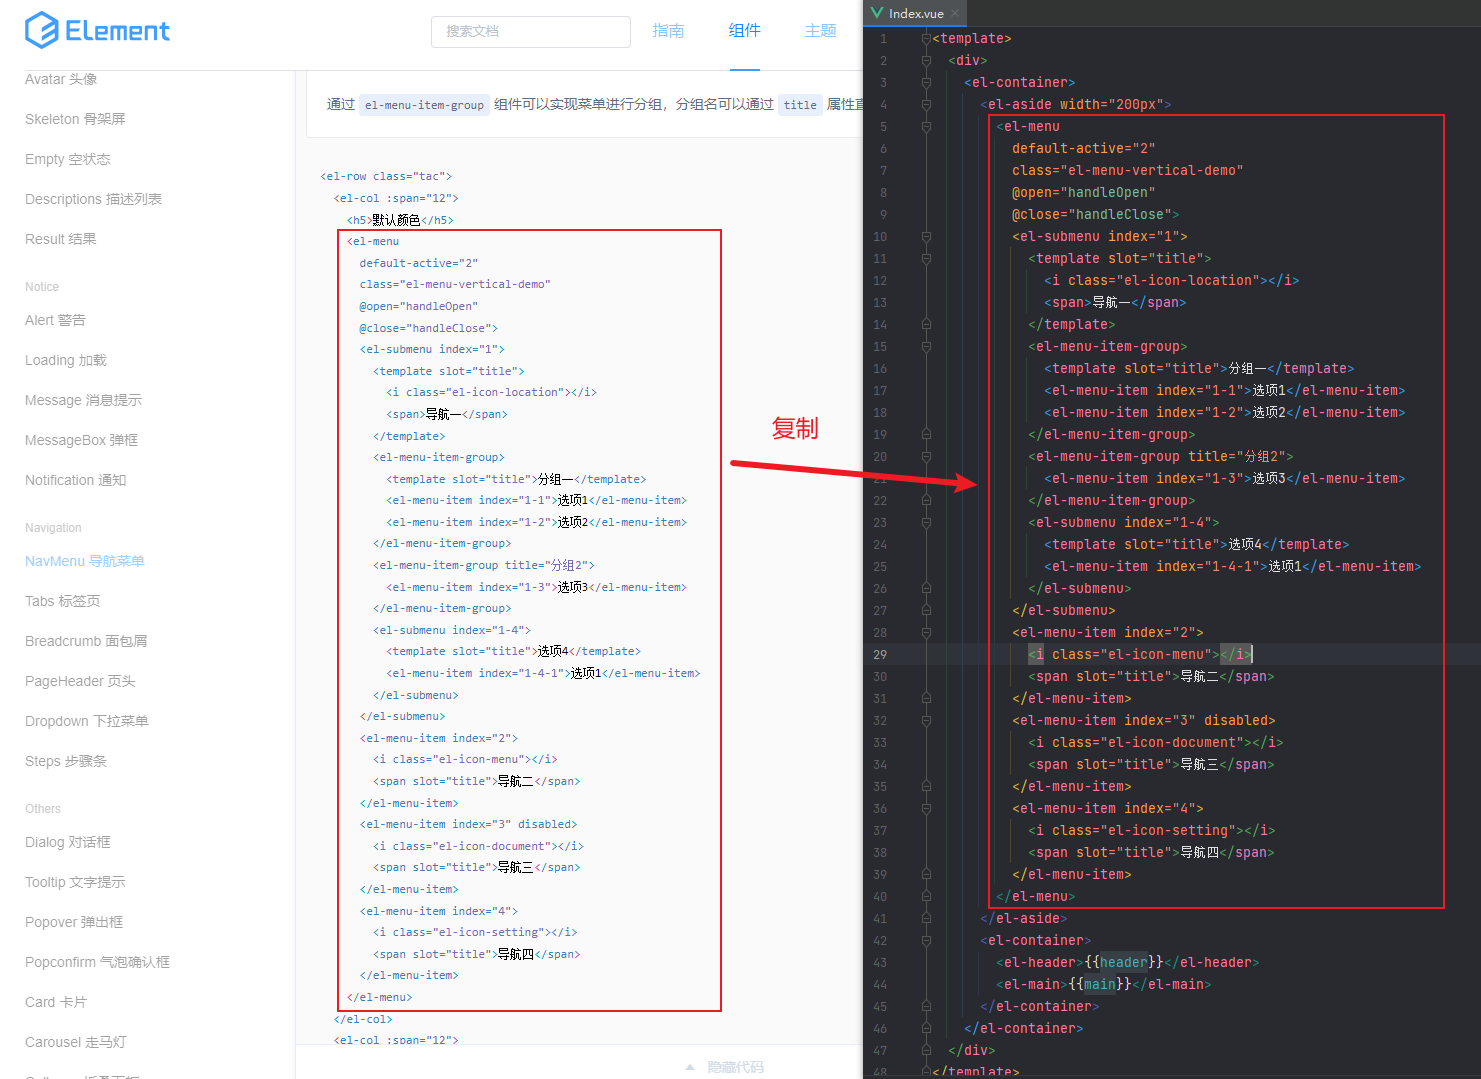
添加导航菜单效果如图:
设置 element-ui 导航菜单动态路由
步骤1:开始导航菜单路由模式
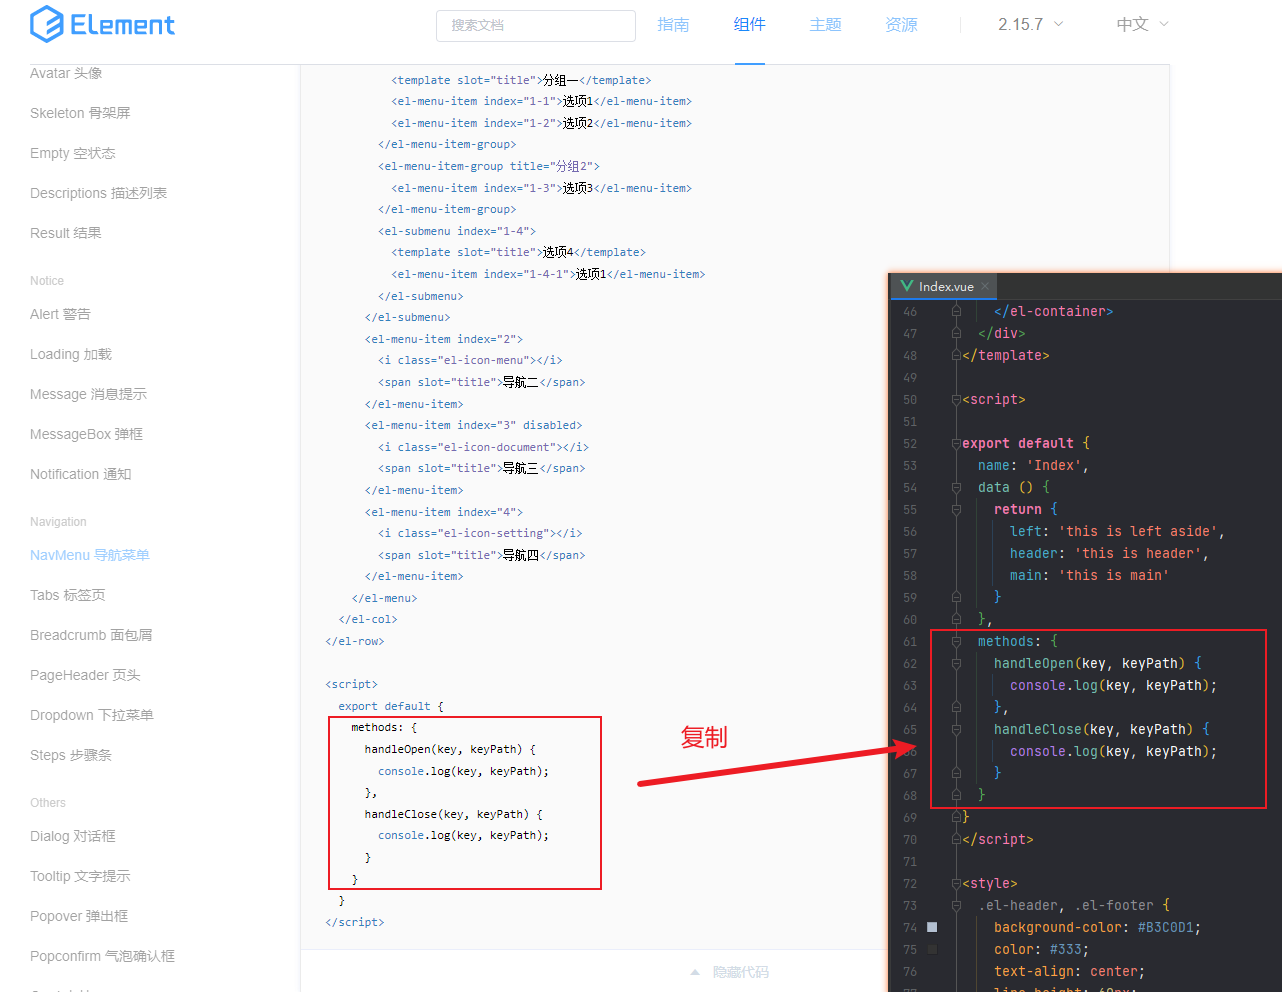
在Index.vue组件中,将菜单<el-menu>标签属性中设置开启使用 vue-router 的模式,启用该模式会在激活导航时以 index 作为 path 进行路由跳转,并且在<el-main>标签中增加<router-view/>路由组件:
1 | <template> |
具体改动如下:

步骤2:创建菜单对应的 vue 组件
创建菜单对应的 vue 组件:
SystemConfig.vue
1 | <template> |
LinkMgt.vue
1 | <template> |
步骤3:配置路由
在router/index.js配置中将路由与步骤 2 创建的组件关联:
1 | import Vue from 'vue' |
注意:
- 上述配置中对 Router 对象加了
mode: 'history',这样路由地址中就会去除 # 号。 - 首页路由增加了
redirect,访问首页直接重定向到/linkMgt
导航菜单支持动态路由效果如图:
引入 ECharts 组件
ECharts官网:https://echarts.apache.org/zh/index.html
步骤1:安装 ECharts
停止运行中的项目,在项目根据目录安装ECharts依赖:
1 | npm install echarts --save |
步骤2:将 ECharts 定义到 vue 的原型上
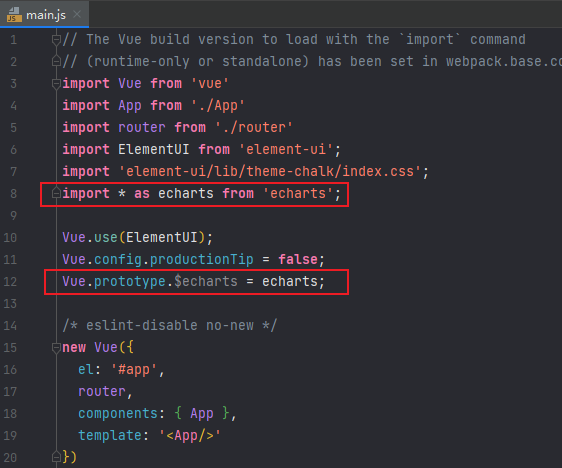
在main.js配置文件中将 ECharts 定义到 vue 的原型上:
1 | import * as echarts from 'echarts'; |
具体改动如下:
步骤3:在组件中引入 ECharts 图表组件
在LinkMgt.vue组件中引入ECharts图表组件:
1 | <template> |
引入 Echarts 效果如图:

引入 element-ui 动态表格
步骤1:安装 mock 服务
使用 npm 安装json-server服务:
1 | npm install -g json-server |
在一个空目录中创建db.json文件:
1 | { |
在db.json文件所在目录执行命令,启动 mock 服务:
1 | json-server --watch db.json |
json-server服务启动成功如图:

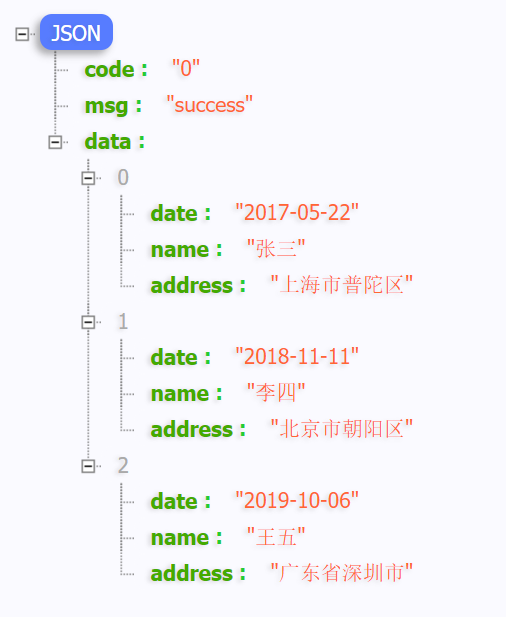
浏览器访问http://localhost:3000即可看到`db.json`配置中的 mock 接口:
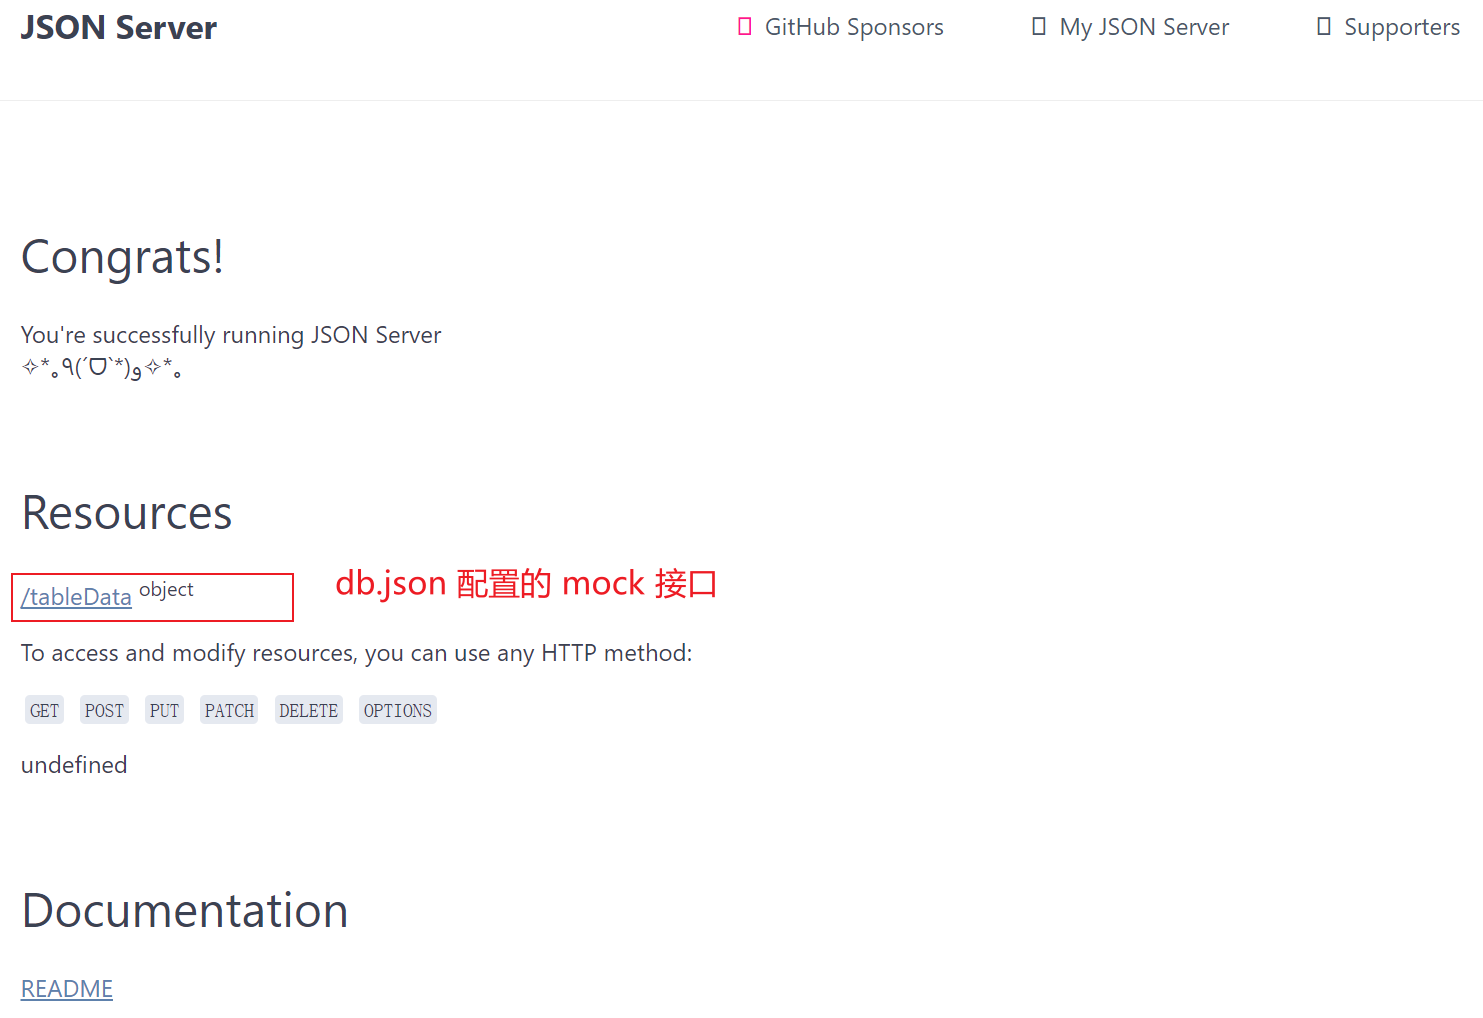
点击上图中的tableData接口可以看到响应成功的 json 报文:
步骤2:引入axios依赖
停止项目运行,在项目根目录下执行安装命令:
1 | npm install axios --save |
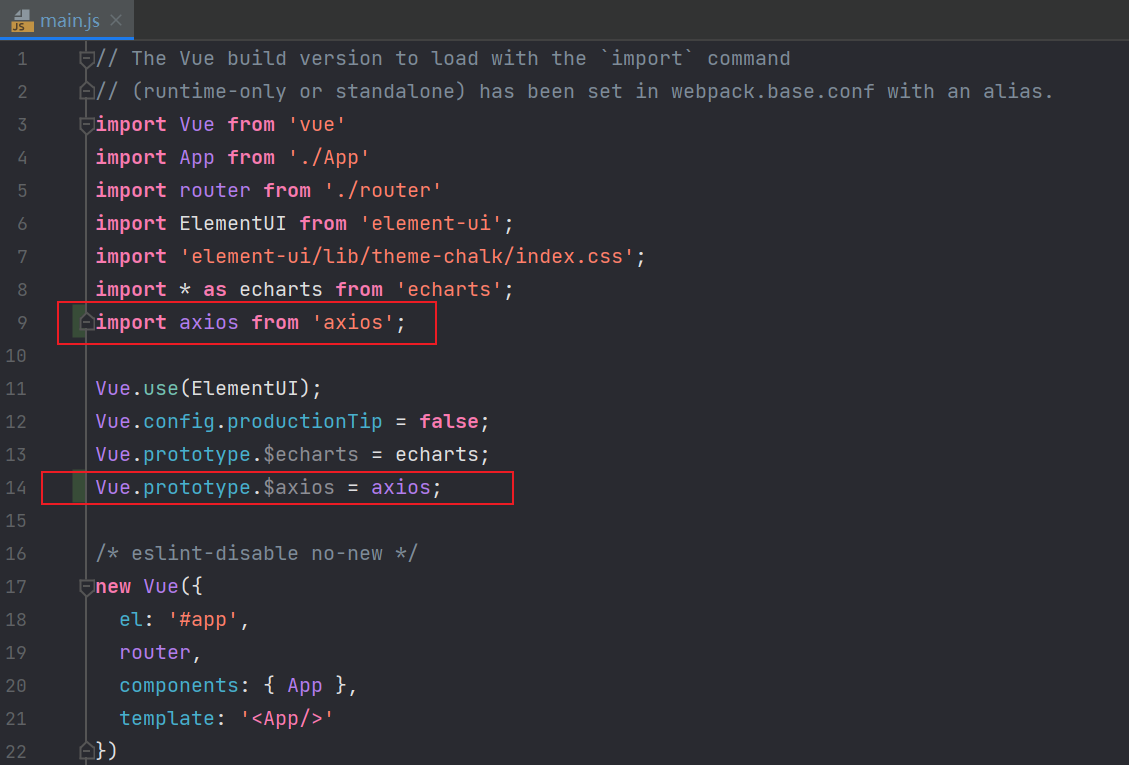
在main.js配置文件中将 axios 定义到 vue 的原型上:
1 | import axios from 'axios'; |
具体改动如下:
步骤3:引入动态表格组件
在SystemConfig.vue组件中将动态表格组件引入:
1 | <template> |
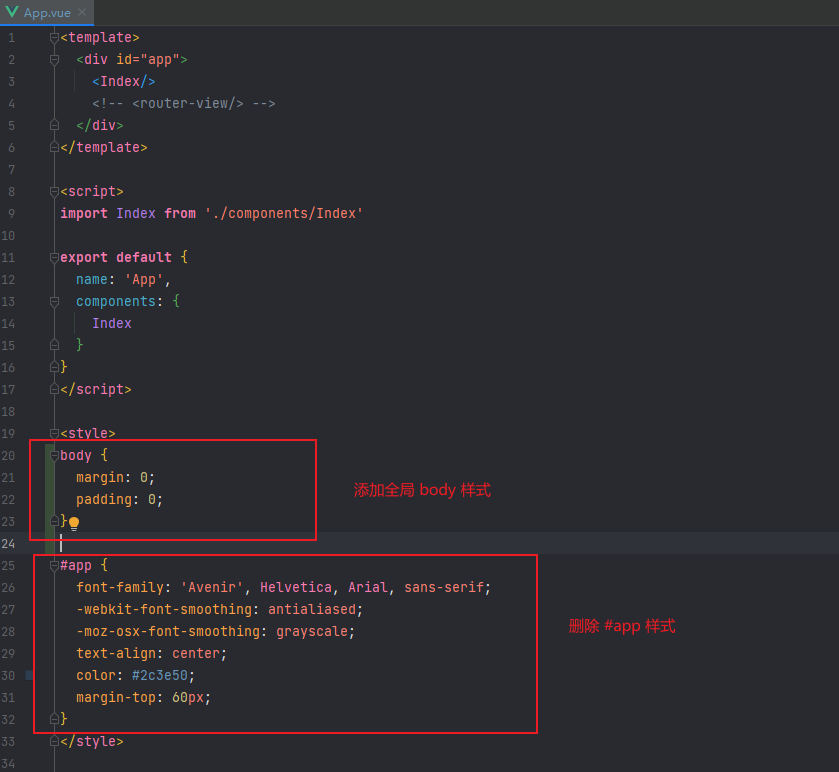
由于<el-main>包裹表格导致表格的表头异常高,可以在Index.vue中将.el-main样式中的line-height样式删除:

整个页面与浏览器边界有“留白”,可以在App.vue中增加样式
1 |
|
具体改动如下:
引入动态表格效果如下: