
基础知识
重要组件
一个完整的 Spring Boot Starter 一般包含以下核心组件:
- autoconfigure 模块:包含自动配置的代码
- starter 模块:提供对 autoconfigure 模块的依赖,以及一些其它的依赖
(PS:如果不需要区分这两个概念的话,也可以将自动配置代码模块与依赖管理模块合并成一个模块)
简而言之,其他服务需要启动器的时候,只需要引入一个 starter 就够了
命名规则
Spring Boot 提供的 starter 是以spring-boot-starter-xxx的方式命名。官方建议自定义的 starter 使用xxx-spring-boot-starter命名规则。以区分 Spring Boot生态提供的 starter。
工程架构说明
根据上俩节的描述,用一张图来描述,就是要自己编写:红色的woodwhales-spring-boot-autoconfigure 和粉色的woodwhales-spring-boot-starter ,将 woodwhales-spring-boot-starter 工程打包成 jar 供其他工程依赖使用:
1 | @startuml |
工程结构准备
笔者使用 IDEA 开发工具演示,使用 STS 4 也可以。
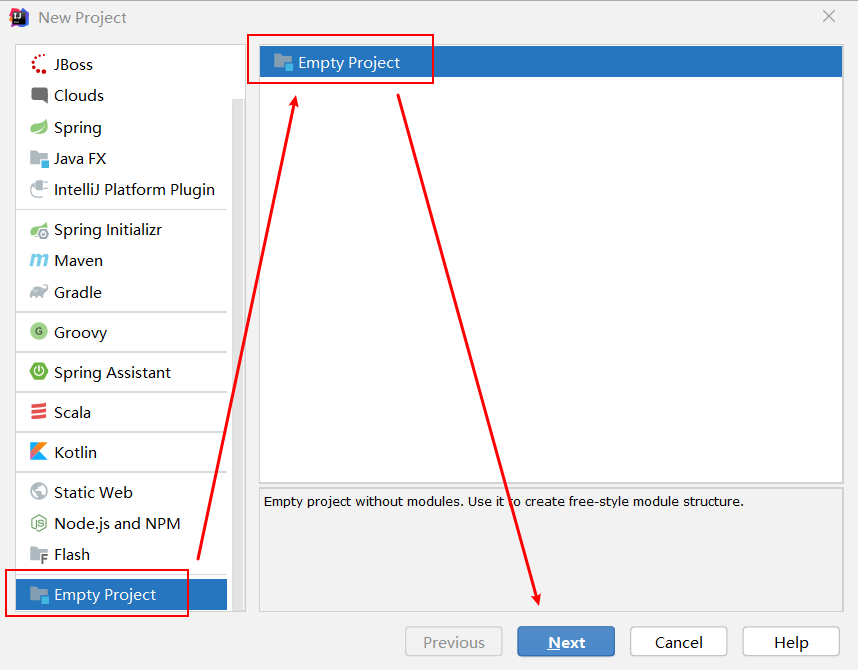
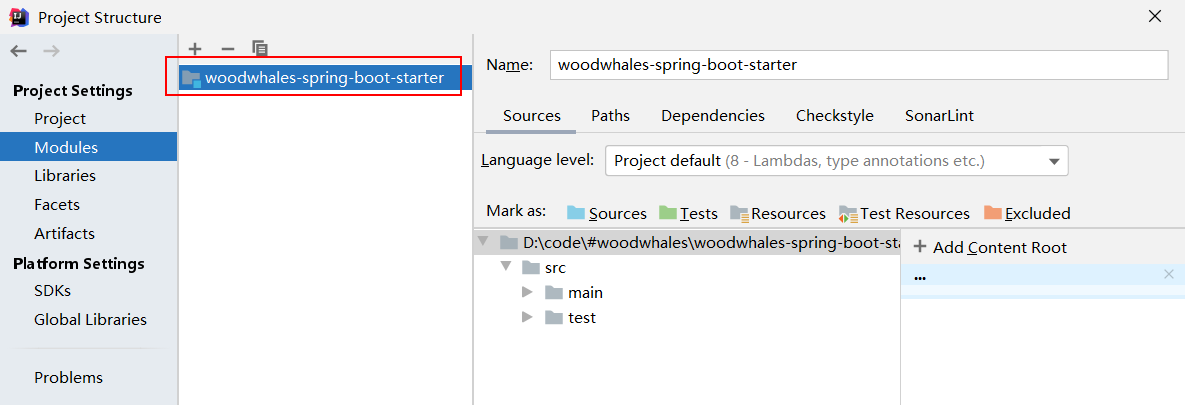
在自己喜欢的地方创建一个名称为woodwhles-spring-boot-starter的空工程目录:
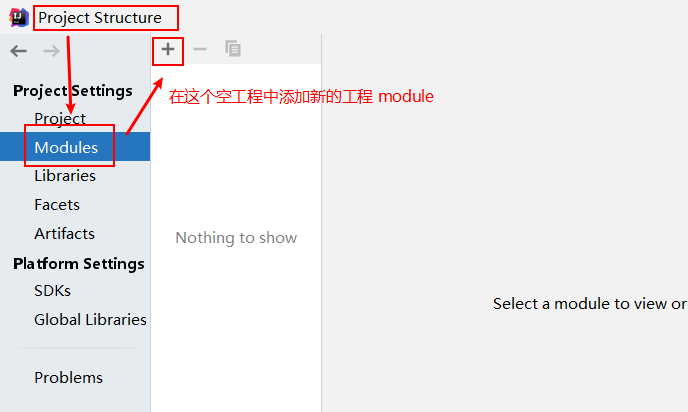
 在空工程中添加新的工程模块:
woodwhales-spring-boot-starter 工程搭建
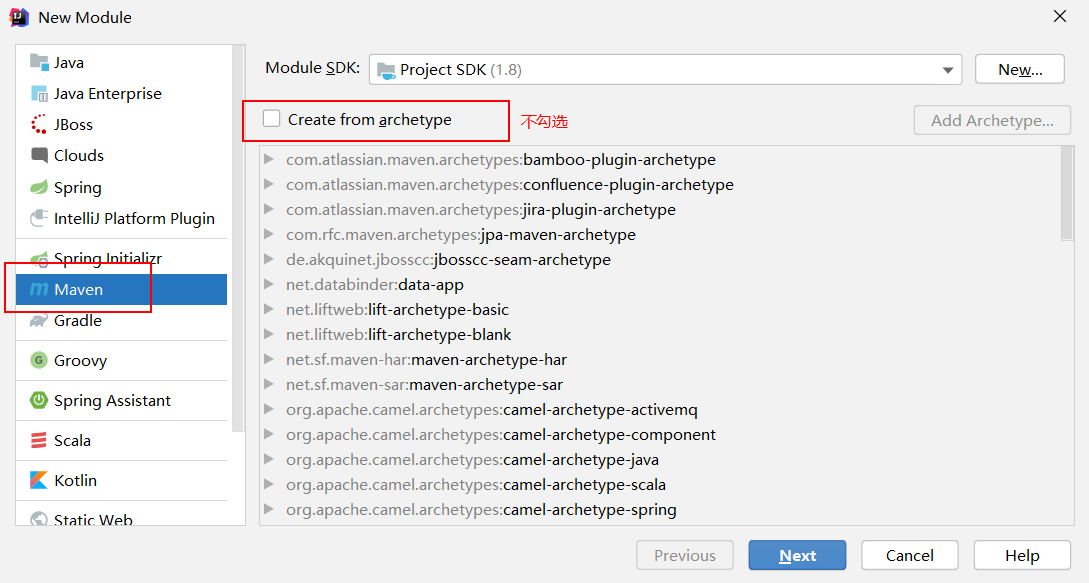
创建一个干净的 maven 工程:
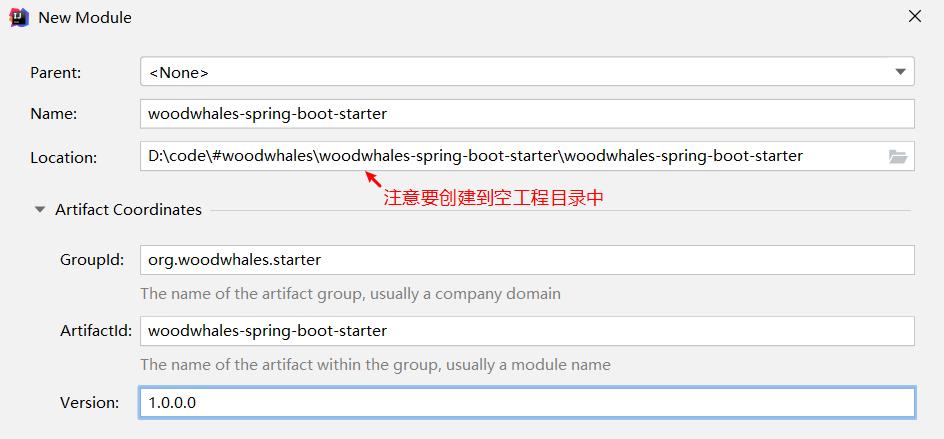
指定工程的目录及 maven 坐标信息:
创建成功之后空工程中多了一个woodwhles-spring-boot-starter的模块:
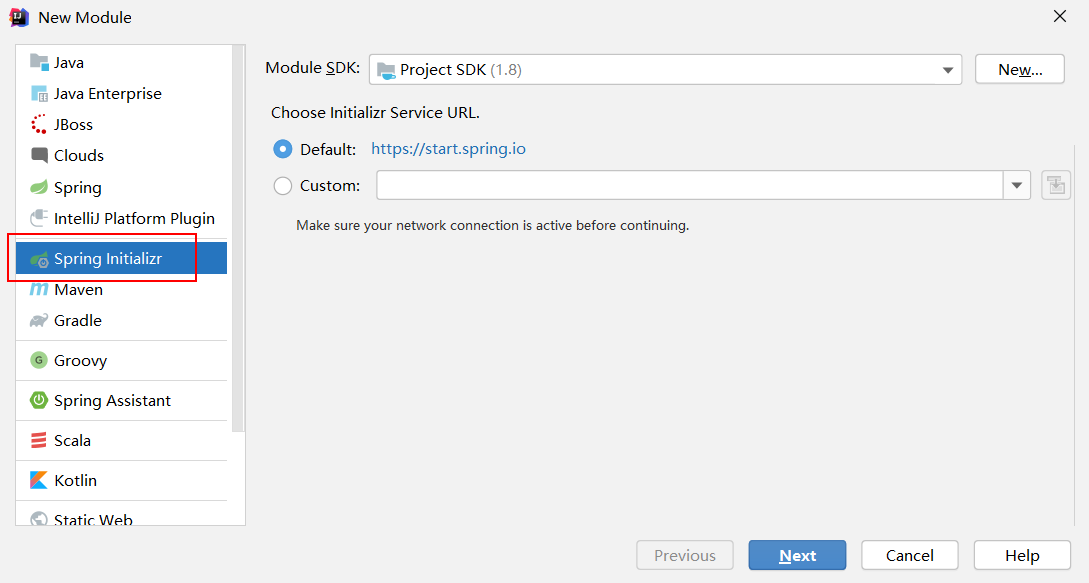
woodwhales-spring-boot-autoconfigure 工程搭建
继续在空工程中创建模块,这次使用 Spring Initializr 快速创建 autoconfigure 工程:
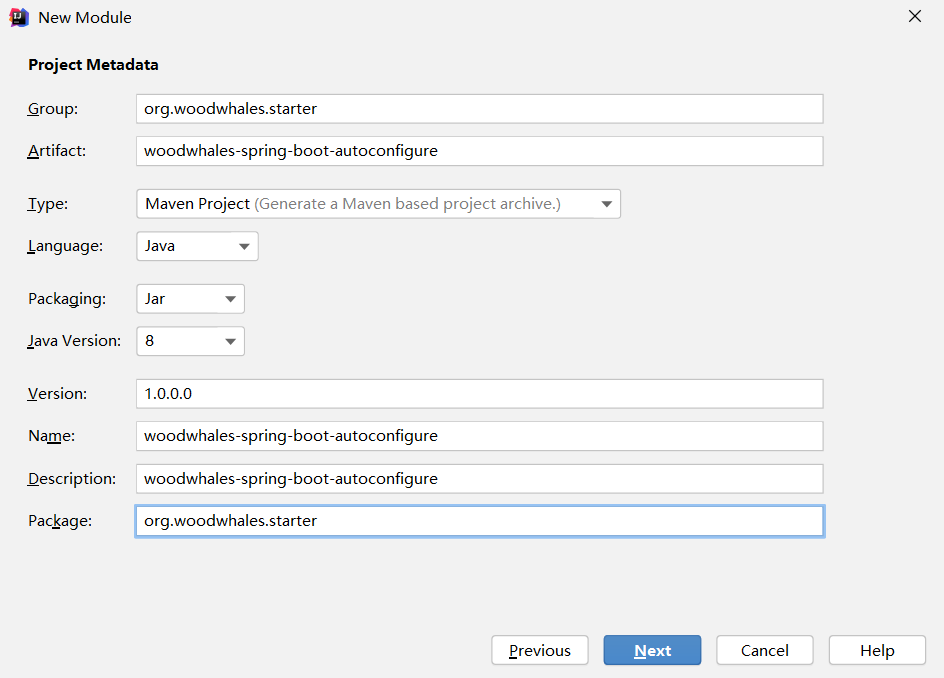
指定好 maven 坐标信息及工程名:
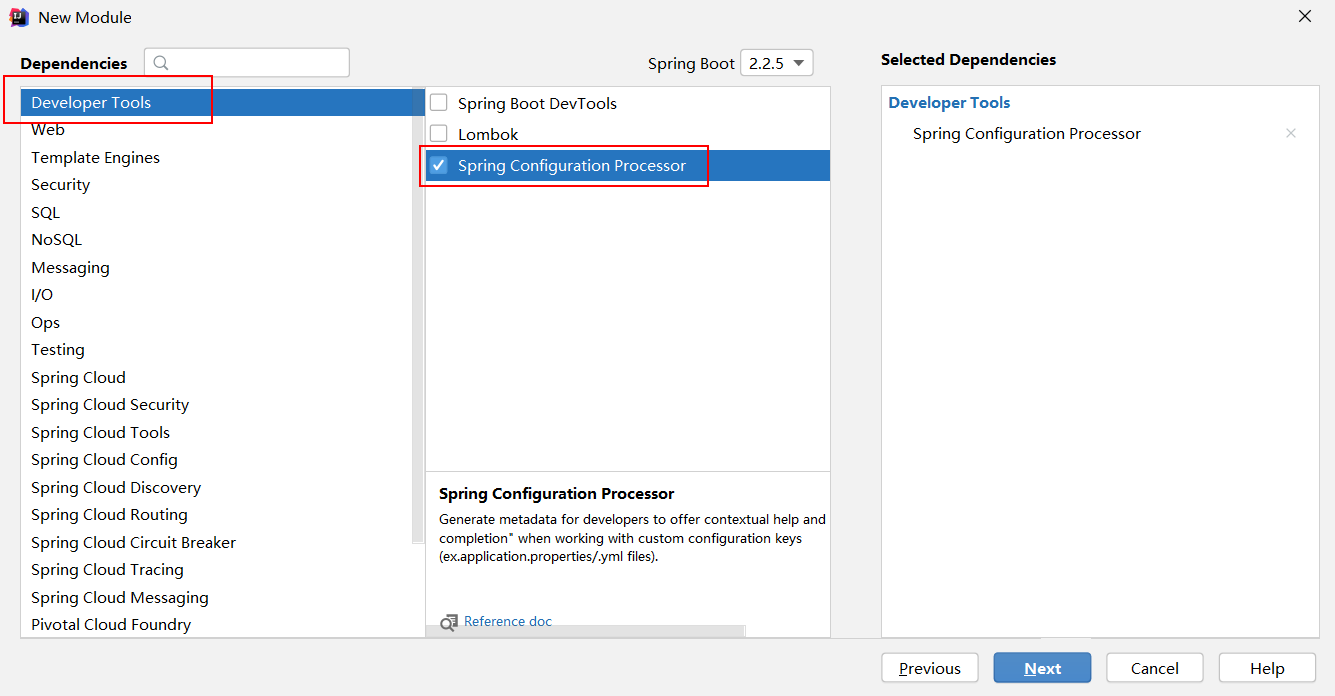
只添加spring-boot-configuration-processor依赖:
最后注意检查当前工程是不是被创建在空工程中:

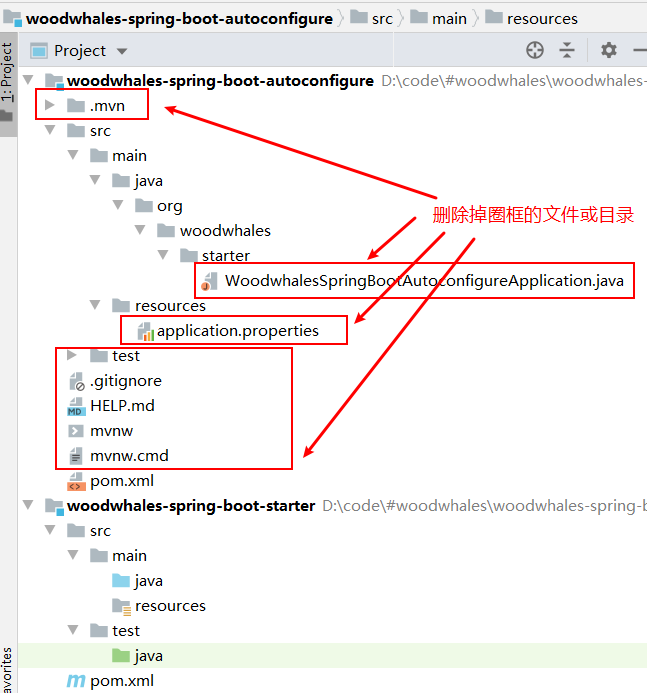
woodwhales-spring-boot-autoconfigure 工程中将无用的文件删除:
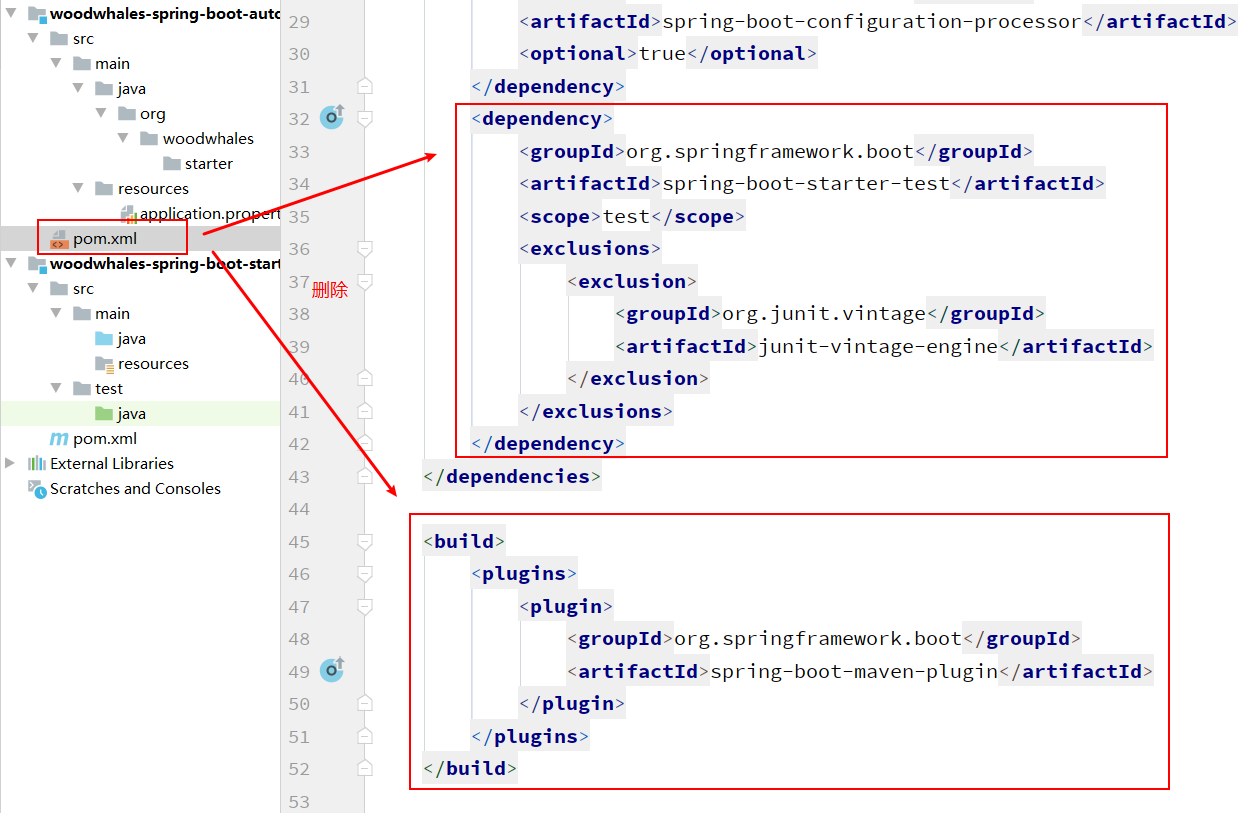
再将 woodwhales-spring-boot-autoconfigure 工程中 pom 依赖中的构建工具插件及 spring-boot-starter-test 依赖删除:
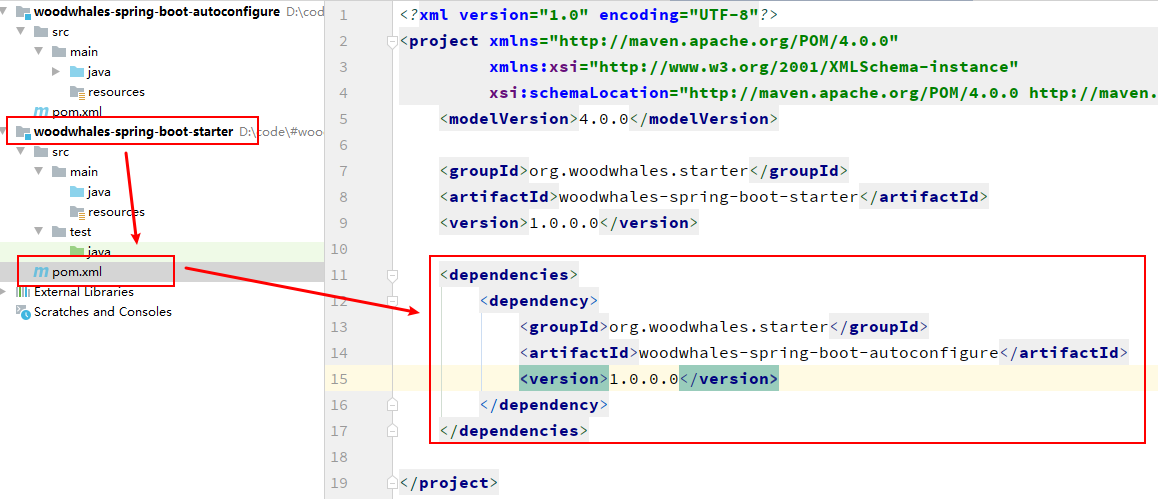
最后在 woodwhales-spring-boot-starter 工程中引入 woodwhales-spring-boot-autoconfigure 工程依赖:
上述的工程环境准备好之后,开始编写对应的配置文件或者业务代码。
为了编译不会报警告,可以增加 jdk 版本和字符集约束:
1 | <properties> |
编写业务配置类 HelloProperties
定义自定义配置类,这个配置类可以读取到引用了本自定义 starter 的工程中的配置信息:
1 | import org.springframework.boot.context.properties.ConfigurationProperties; |
编写业务类 HelloService
1 | import java.util.Objects; |
编写自动注入配置类 HelloServiceAutoConfiguration
1 | import org.springframework.beans.factory.annotation.Autowired; |
@Configuration
@Configuration注解的作用等同于 xml 中的<beans>标签@EnableConfigurationProperties
@EnableConfigurationProperties注解是用来开启对 3 步骤中@ConfigurationProperties注解配置 Bean 的支持。也就是@EnableConfigurationProperties注解告诉 Spring Boot 能支持@ConfigurationProperties。当然了,也可以在
@ConfigurationProperties注解的类上添加@Configuration或者@Component注解。
自动配置类装配生效
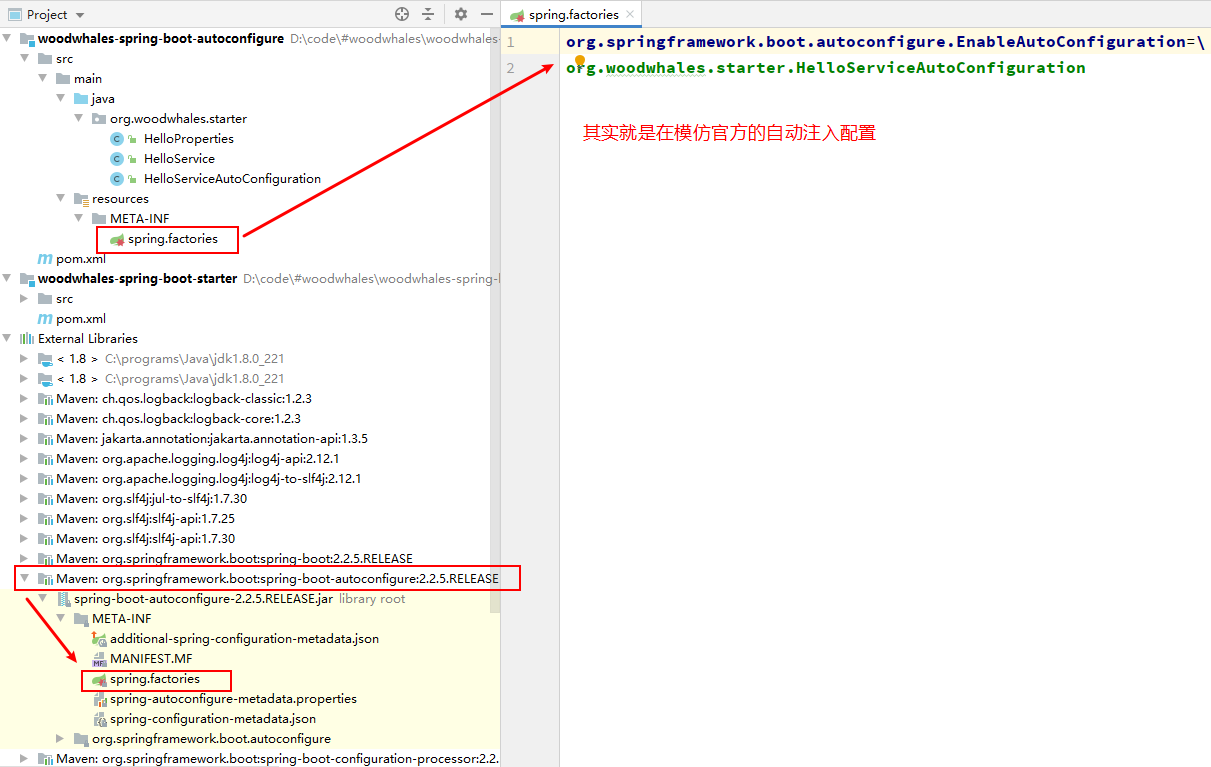
要想上述的步骤能生效就要在resources文件目录下创建META-INF文件夹,再创建名称为spring.factories的配置文件,将上述的自动注入配置类配置到 spring boot 中:
1 | org.springframework.boot.autoconfigure.EnableAutoConfiguration=\ |
最终效果如图:
打包与测试
先将woodwhales-spring-boot-autoconfigure工程打包安装到本地 maven 仓库,再打包安装woodwhales-spring-boot-starter,编写简单的web工程测试:
引入依赖:
1 | <dependency> |
配置文件配置:
1 | server: |
控制层测试:
1 | import org.springframework.beans.factory.annotation.Autowired; |
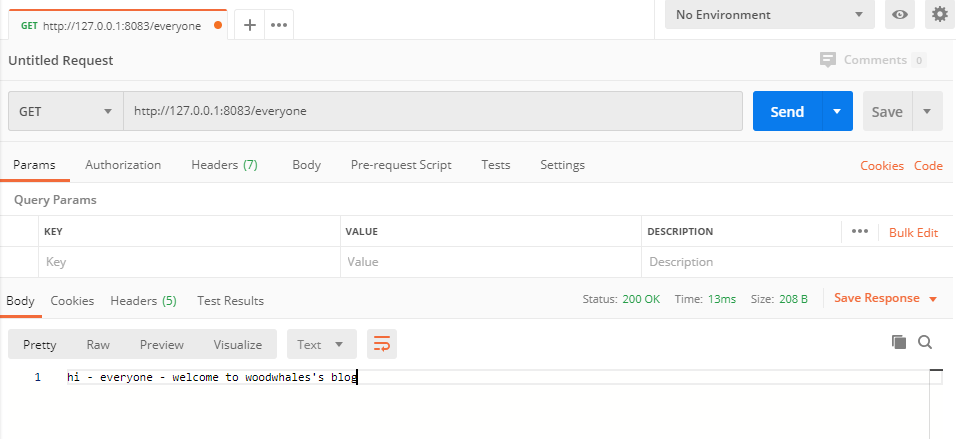
postman 测试成功:
应用场景
自定义启动器一般应用场景:动态数据源、登录模块、基于AOP技术实现日志切面等。
日志记录服务
由于日志需要使用到日志打印,所以需要引入一些其他工具,方便开发:
1 | <dependency> |
对上述的启动器进行升级改造:增加自定义的@MyLog注解,实现业务工程在对应的方法上使用这个注解就能打印日志:
编写 @MyLog 注解
1 | import java.lang.annotation.ElementType; |
编写 MyLogInterceptor 拦截器
拦截器拦截请求,并获取方法上的注解信息,如果使用了 @MyLog 注解,那么就打印日志:
1 | import com.alibaba.fastjson.JSON; |
拦截器装配
将拦截器注入 InterceptorRegistry 中:
1 | import org.springframework.context.annotation.Configuration; |
将自动配置类装配生效
spring.factories配置文件中增加
1 | org.springframework.boot.autoconfigure.EnableAutoConfiguration=\ |
测试
日志打印:
1 | 2020-03-14 20:18:09.679 INFO 3820 --- [0.0-8083-exec-2] o.w.starter.log.MyLogInterceptor : 描述:查询用户 |
这个日志打印没有打印请求体数据,如果想看支持打印请求数据的日志的代码,请移步到: