使用 eclipse 开发工具的小伙伴们,建议使用 Spring Tools(俗称 STS),这是 spring 组织对 eclipse 进行了再封装,集成了 springboot 插件,比原生的 eclipse 好用一些:https://spring.io/tools/
以下所有配置设置没有特殊说明,都是在 windows -> preferences 窗口中设置。
字体大小
General > Apperance > Colors and Fonts > Basic > Text Font,点击右边的Edit编辑按钮,设置字体大小。

编码字符集
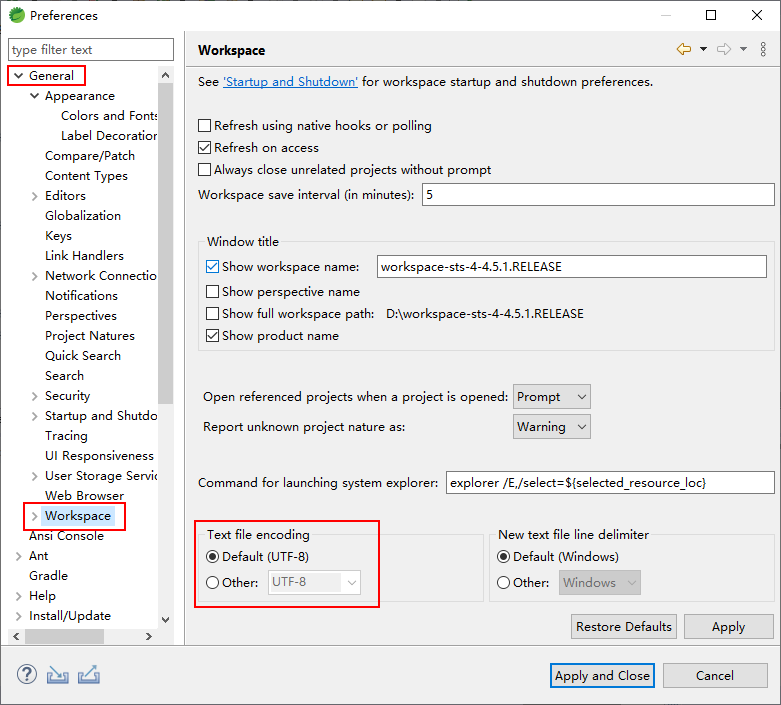
工作空间
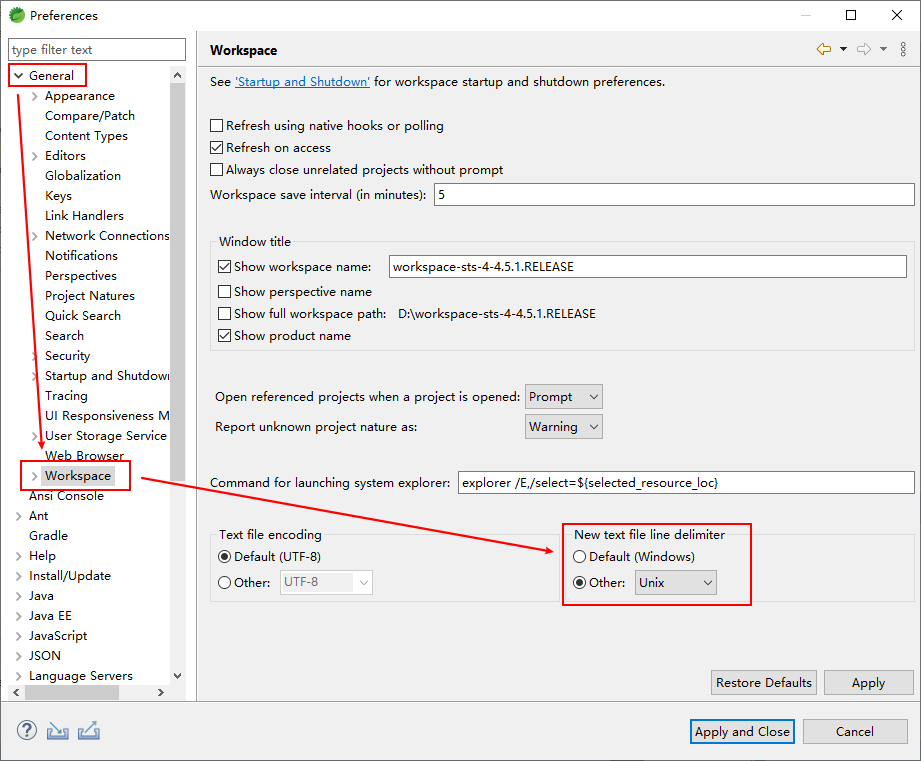
General > Workspace,在Text file encoding选项中,选择UTF-8。
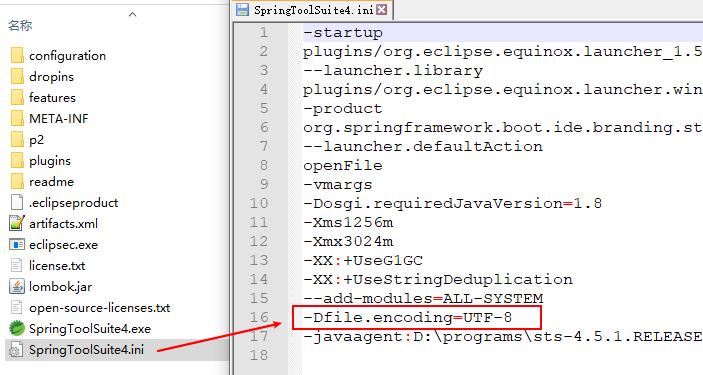
笔者因为在eclipse.ini文件中配置了一行参数:-Dfile.encoding=UTF-8,所以默认就是 UTF-8。
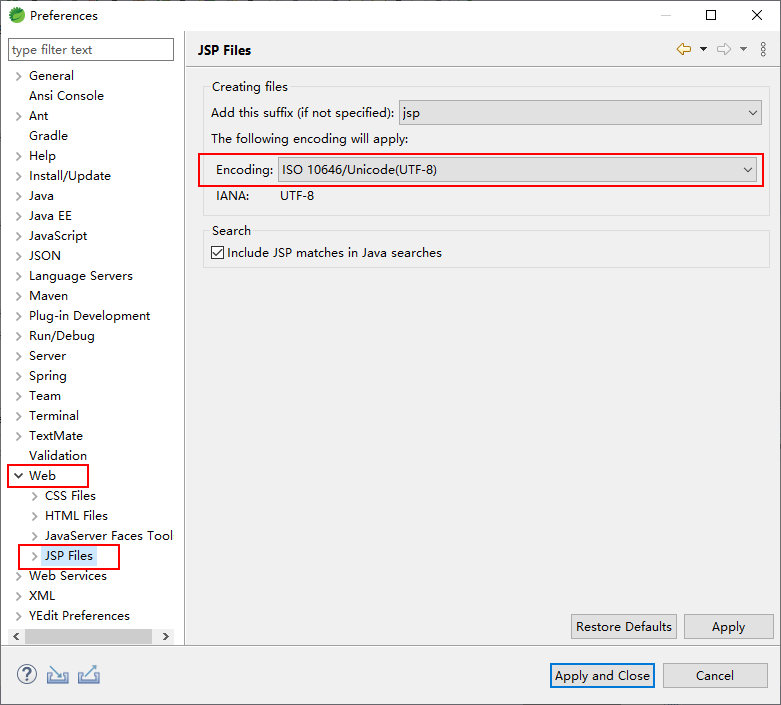
JSP 文件
Web > JSP Files,设置Encoding为:UTF-8。
其他文件
General > Content Types > Text,在Default encoding文本框中手动填写:UTF-8,之后点击Update按钮。
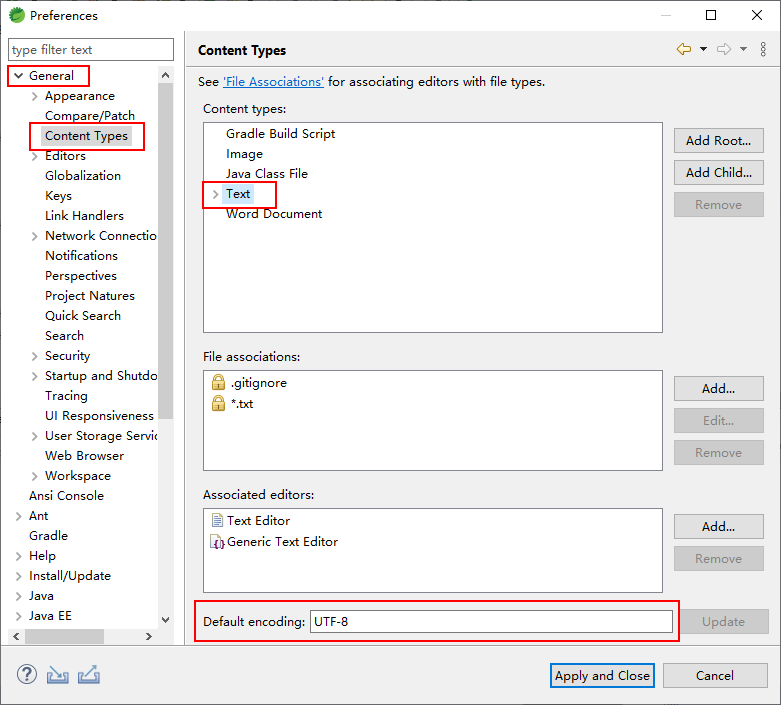
注意,要检查Text 下拉项下的所有Default encoding 是不是都是 UTF-8,默认情况下,会存在一些选项不是 UTF-8,因此要特别细心检查一遍。
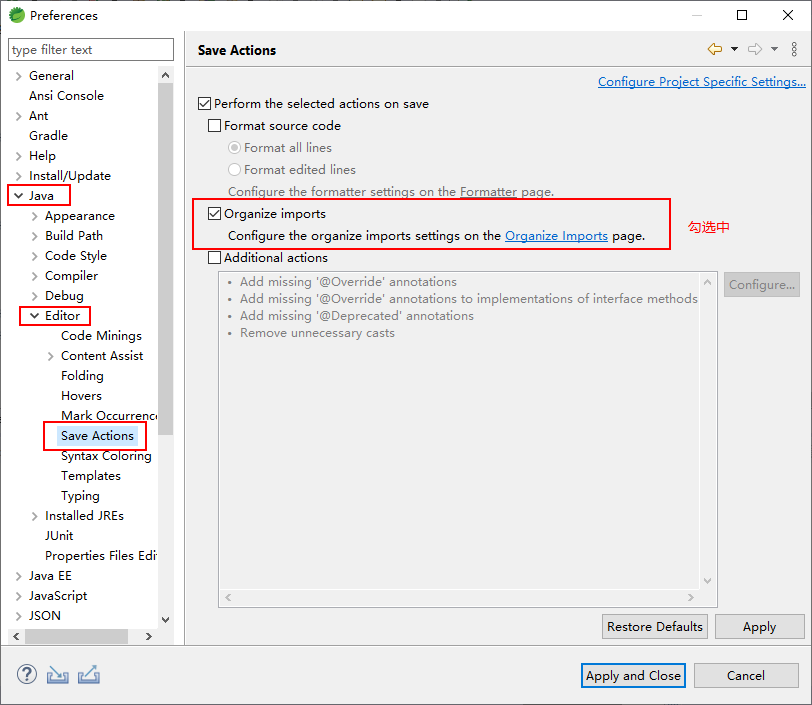
开启自动导包
Java > Editor > Save Actions,勾选Organize impots。
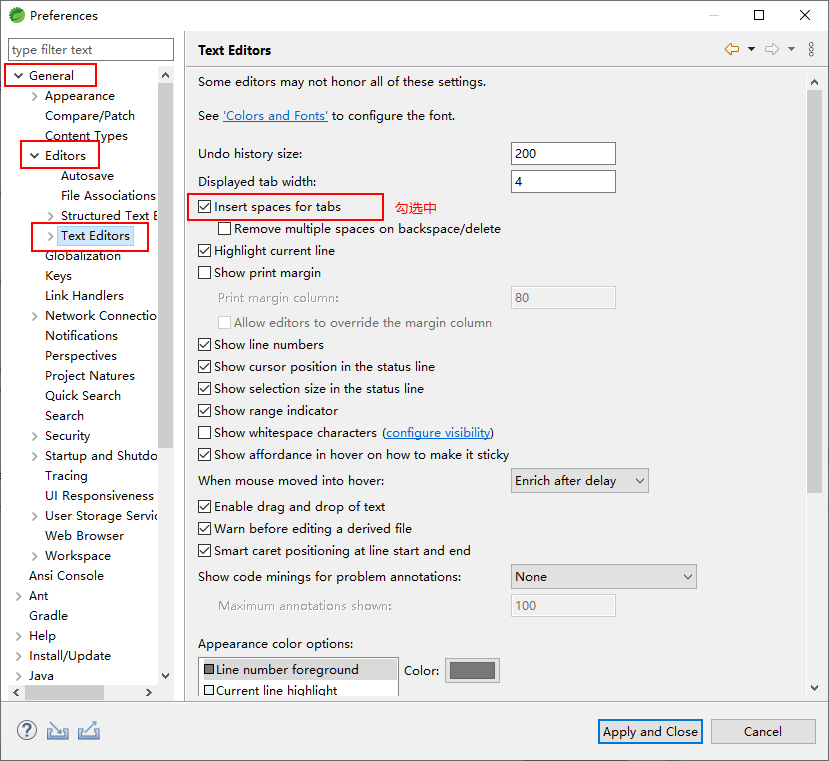
设置 tab为 4 个空格缩进
在阿里《Java 开发手册》中,强制要求禁用 tab,使用 4 个字符来替代 tab。
《Java 开发手册》
【强制】采用 4 个空格缩进,禁止使用 tab 字符。
说明:如果使用 tab 缩进,必须设置 1 个 tab 为 4 个空格。IDEA 设置 tab 为 4 个空格时,请勿勾选 Use
tab character;而在 eclipse 中,必须勾选 insert spaces for tabs。
General > Editors > Text Editors,勾选中insert space for tabs。
设置换行符为Unix格式
在阿里《Java 开发手册》中强制要求换行符使用 Unix 格式。
《Java 开发手册》
【强制】IDE 的 text file encoding 设置为 UTF-8; IDE 中文件的换行符使用 Unix 格式,不
要使用 Windows 格式。
自动补齐提示
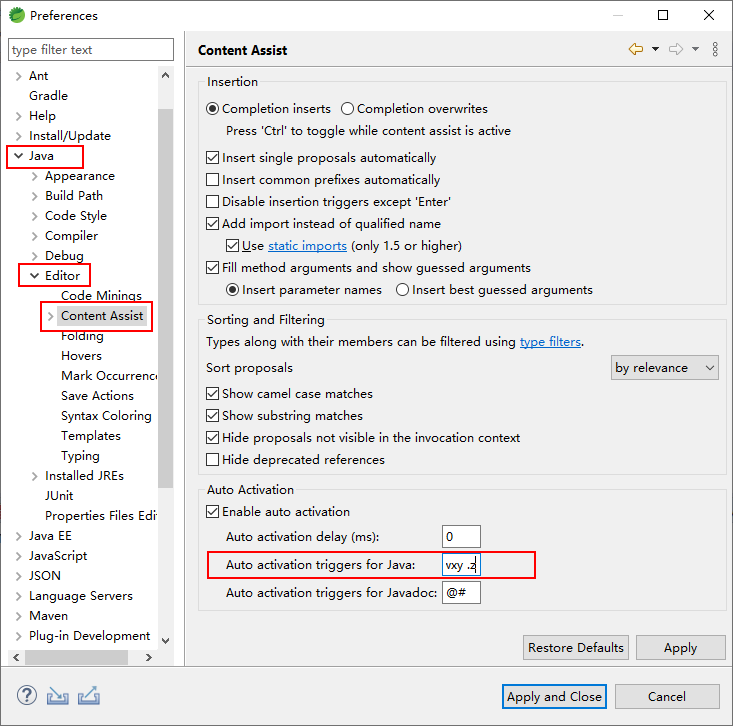
Java 文件自动补齐
Java > Editor > Content Assist,在Auto activation triggers for Java文本框中填写:
1 | .abcdefghijklmnopqrstuvwxyzABCDEFGHIJKLMNOPQRSTUVWXYZ |
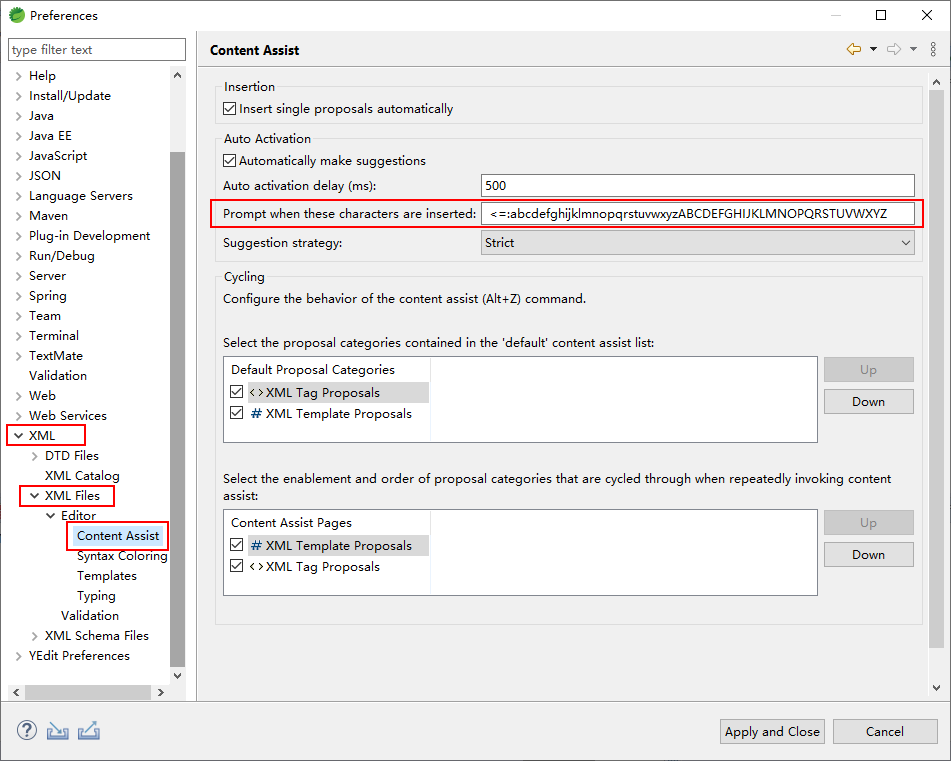
XML 文件自动补齐
XML > XML Files > Editor > Content Assist,在prompt when these characters are insrted文本框中填写:
1 | <=: abcdefghijklmnopqrstuvwxyzABCDEFGHIJKLMNOPQRSTUVWXYZ |
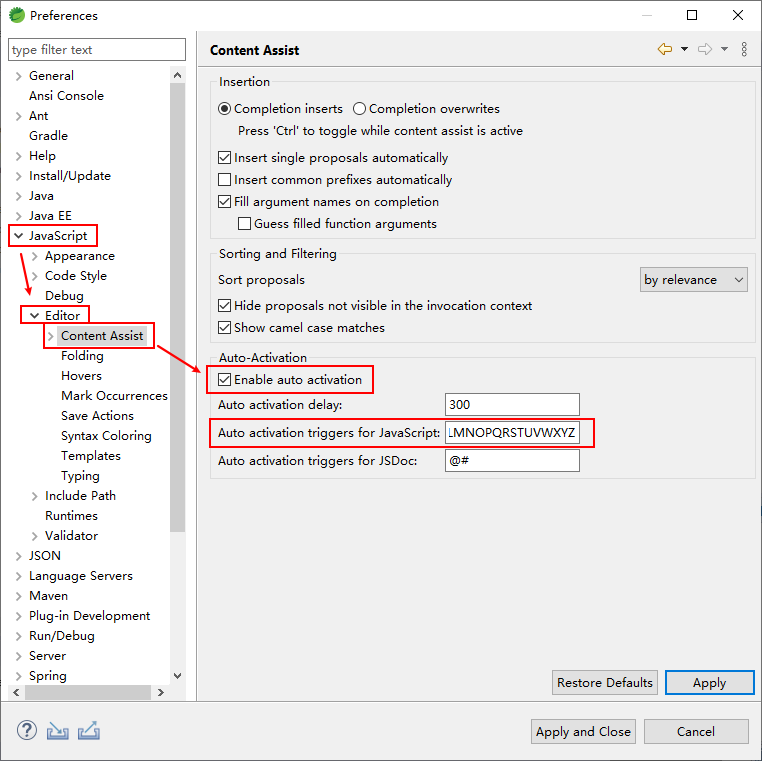
JavaScript 文件自动补齐
JavaScript > Editor > Content Assist,勾选开启自动提示,并填写:
1 | .abcdefghijklmnopqrstuvwxyzABCDEFGHIJKLMNOPQRSTUVWXYZ |
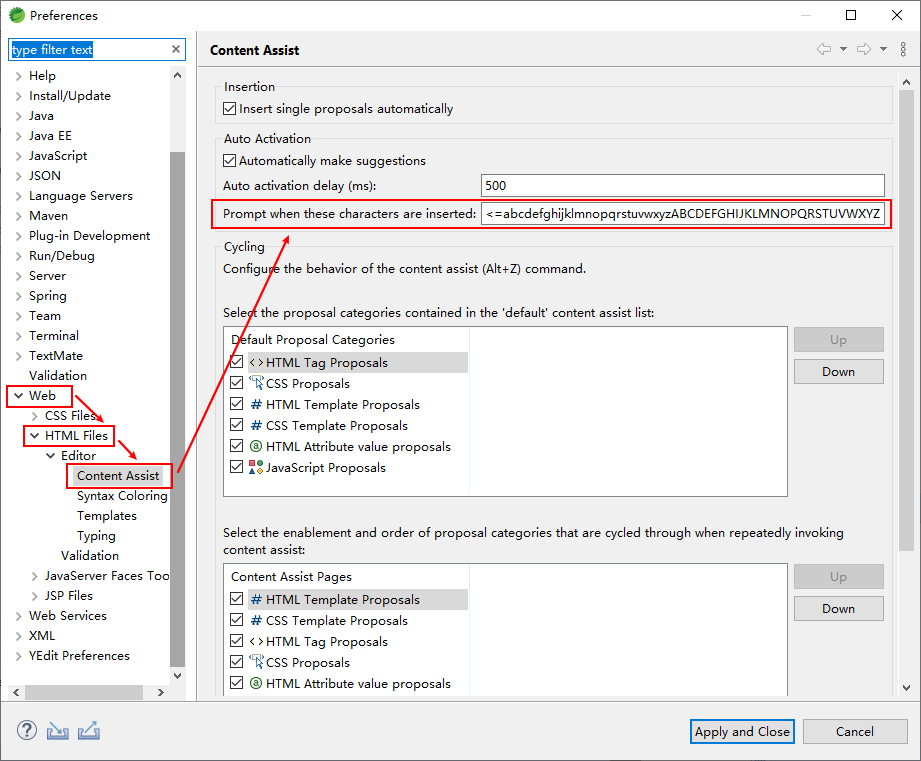
HTML 文件自动补齐
Web > HTML Files > Content Assist,在prompt when these characters are insrted文本框中填写:
1 | <=abcdefghijklmnopqrstuvwxyzABCDEFGHIJKLMNOPQRSTUVWXYZ |
快捷键设置
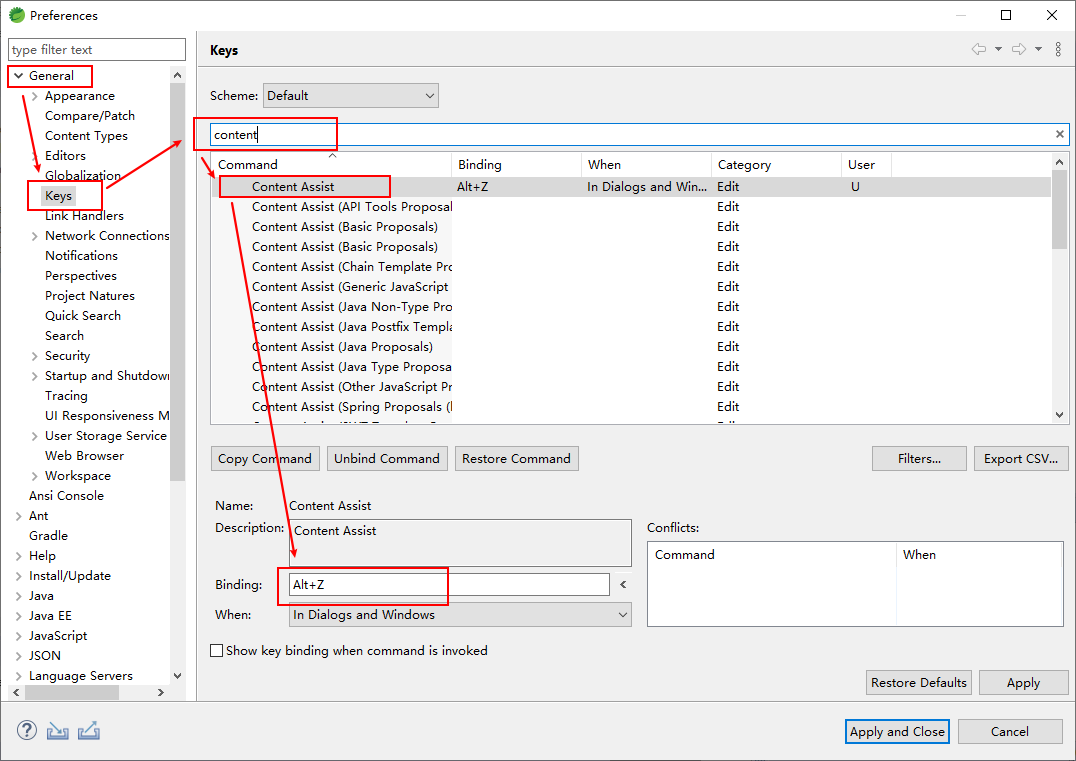
代码自动补齐
Genernal > Keys,设置Content Assist的快捷键为:Alt + Z。
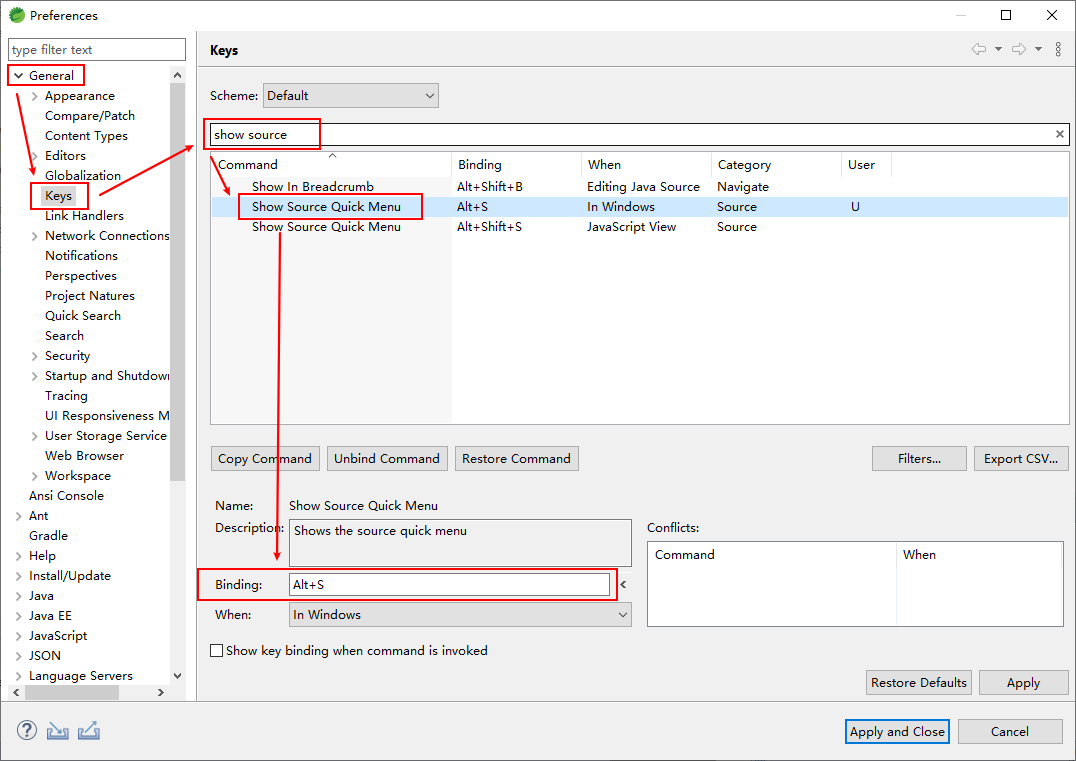
快速开启资源选择菜单
Genernal > Keys,设置Show Source Quick Menu的快捷键为:Alt + S。
常用插件安装
Java Decompiler Eclipse
插件官方地址:http://java-decompiler.github.io/(国内可能访问不到)
插件下载地址:https://github.com/java-decompiler/jd-eclipse/releases
本站下载地址:
windows桌面版:jd-gui-windows-1.6.6.zip
安装步骤,点击 Help > Install New Software,添加 zip 文件:
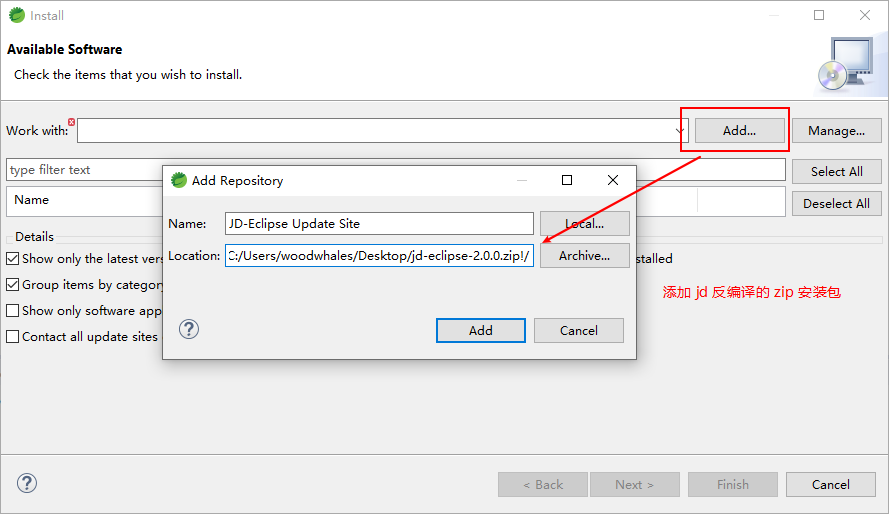
名称填写:JD-Eclipse Update Site,点击next进行安装。
如果不能点击 next 按钮,将 zip 包解压,将 plugins 文件中的 jar 包拷贝到 STS 的 plugins 文件中即可。
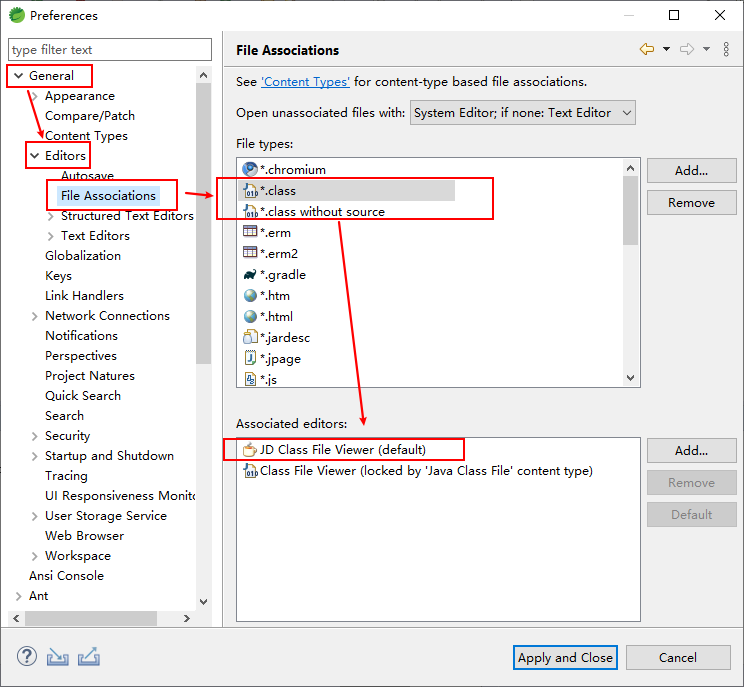
再配置 class 文件默认使用该插件打开:General > Editors > File Associations,分别选中.class、.class without source,再选中下面JD Class File Viewer,再点击Default按钮,设置其为默认。
ER Master
官方安装教程:http://ermaster.sourceforge.net/
安装步骤:将 jar 文件拷贝到plugins文件夹中,重启 eclipse 即可。
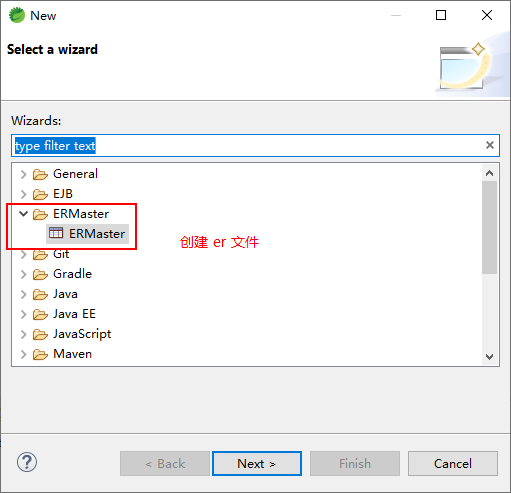
使用步骤:
步骤1:创建er文件。
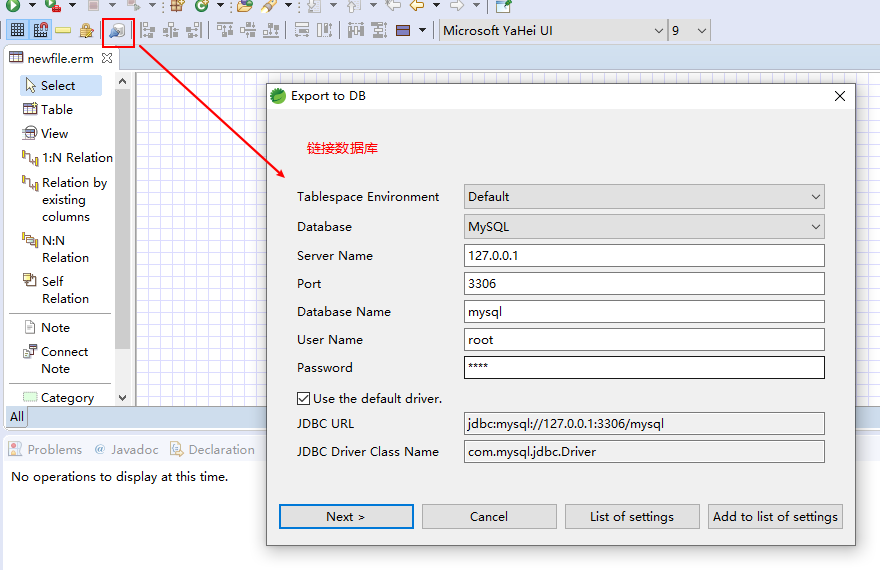
步骤2:链接数据库
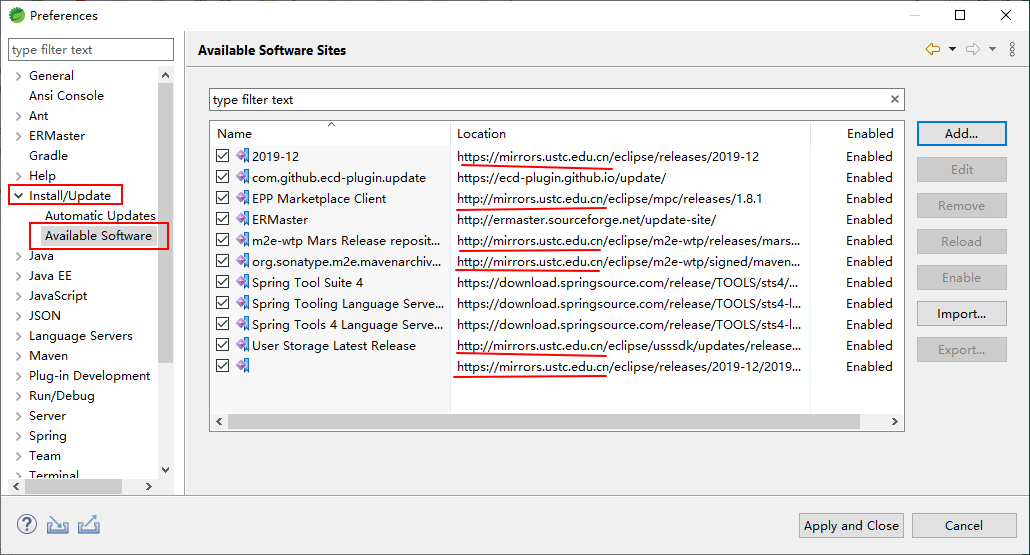
国内镜像替换
中科大镜像官方教程:https://lug.ustc.edu.cn/wiki/mirrors/help/eclipse
以 Luna 为例,点击
Help→Install New Software...→Available Software Sites可以看到所有的更新源,将其中的download.eclipse.org全部替换成mirrors.ustc.edu.cn/eclipse即可。