
ThymeLeaf 环境配置
ThymeLeaf 官网:https://www.thymeleaf.org/
文档:https://www.thymeleaf.org/doc/tutorials/3.0/usingthymeleaf.html
本站文档:thymeleaf-3.0.pdf
pom 依赖:
1 | <!-- thymeleaf --> |
导入 tymeleaf 依赖之后,配置 tymeleaf 参数,在 application.yml 配置文件中配置:
1 | spring: |
Controller 配置注意事项
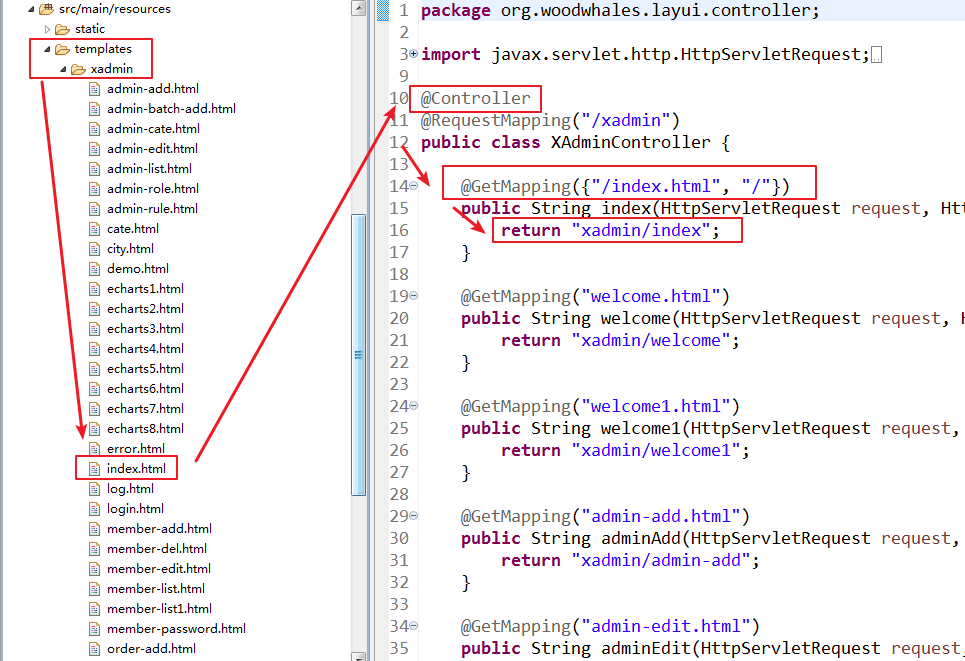
注意如果一个 controller 需要映射页面,那么不要使用 @RestController 注解,而是使用 @Controller 注解,参见下图示例:
html 标签注意事项
使用 thymeleaf 插件
如果使用的开发工具是 STS(https://spring.io/tools3/sts/all),那么可以离线安装一下 thymeleaf 插件,在页面编写的时候可以有 thymeleaf 标签提示。
插件官网:https://www.thymeleaf.org/eclipse-plugin-update-site/
离线安装包下载地址:https://github.com/thymeleaf/thymeleaf-extras-eclipse-plugin/releases
增加 xmlns 配置
注意在页面的 标签中增加 xmlns,指定为:http://www.thymeleaf.org,否则 STS 中 thymeleaf 插件无法自动提示标签:
1 |
|
设置不解析 javascript 语句块
thymeleaf 将 js 代码中的二维数组,当做了自己的标签,进行解析,因此访问页面的时候会出现:Could not parse as expression异常。解决方案就是只需要在 javascript 标签上加th:inline="none"标签即可:
1 | <script type="text/javascript" th:inline="none"> |
Layui 环境配置
layui 官网:https://www.layui.com/
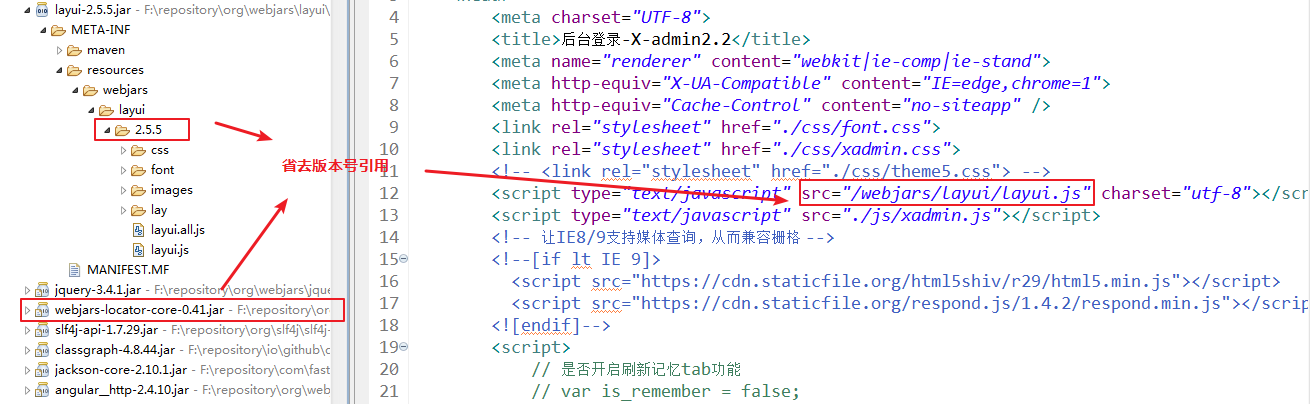
本工程使用 jar 包形式引入 layui 工程:
1 | <!-- layui --> |
增加 layui 的同时,还要增加俩个其他的辅助 jar 包:
增加 jquery,因为 layui 依赖了 jq。
增加去掉 webjars 版本号,当在工程里引用 webjars 目录下的静态文件时不需要指定版本号。
形如:
x-admin 配置
x-admin 官网:http://x.xuebingsi.com/index/down/index.html
引入到 springboot 工程
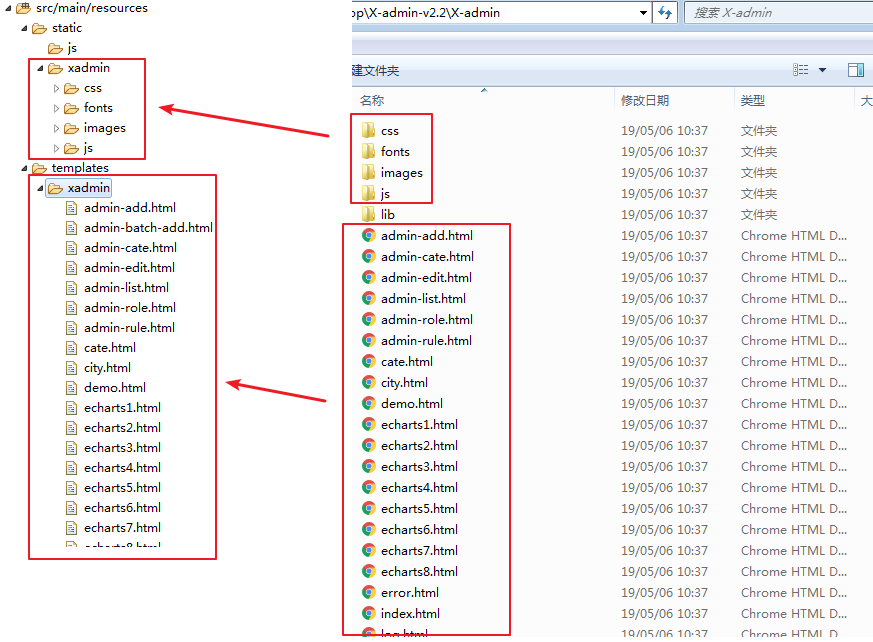
本示例使用后台模板为:x-admin,将下载好压缩包解压,得到:
1 | ─X-admin |
在项目的static和templates文件目录下创建xadmin文件夹:
将 js 、images、css、fonts 目录拷贝至:/src/main/resources/static/xadmin目录下,
将所有 html 页面拷贝至:src/main/resources/templates/xadmin目录下:
注意:这里不需要拷贝 lib 目录了,因为上文已经引入了 layui 的 jar 包了
页面映射路径注意事项
本示例将模板放在了 xadmin 目录下,所以首页路径映射是下面这样的:
1 |
|
静态资源访问路径注意事项
x-admin 模板对静态文件引用使用的是相对路径,因此需要更改一下:
1 | <script src="./lib/layui/layui.js" charset="utf-8"></script> |
为了保持项目“干净”,每个文件末尾有个下文这样的 js 脚本,可以删除掉:
1 | <script>var _hmt = _hmt || []; (function() { |
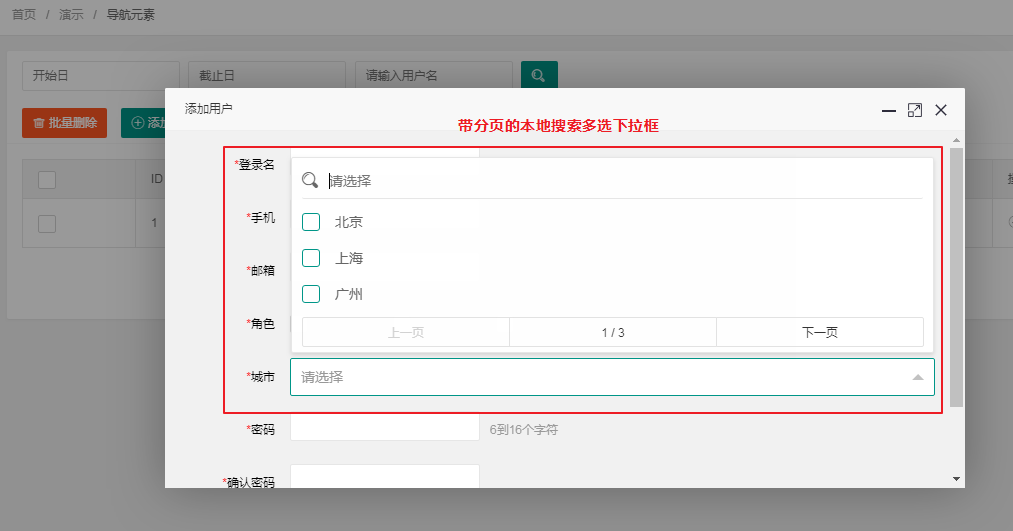
xm-select 下拉多选
官网地址:https://maplemei.gitee.io/xm-select/#/component/install
本示例运行效果:
html 页面位置:src/main/resources/templates/xadmin/admin-add.html
在城市字段位置增加了下拉多选框:
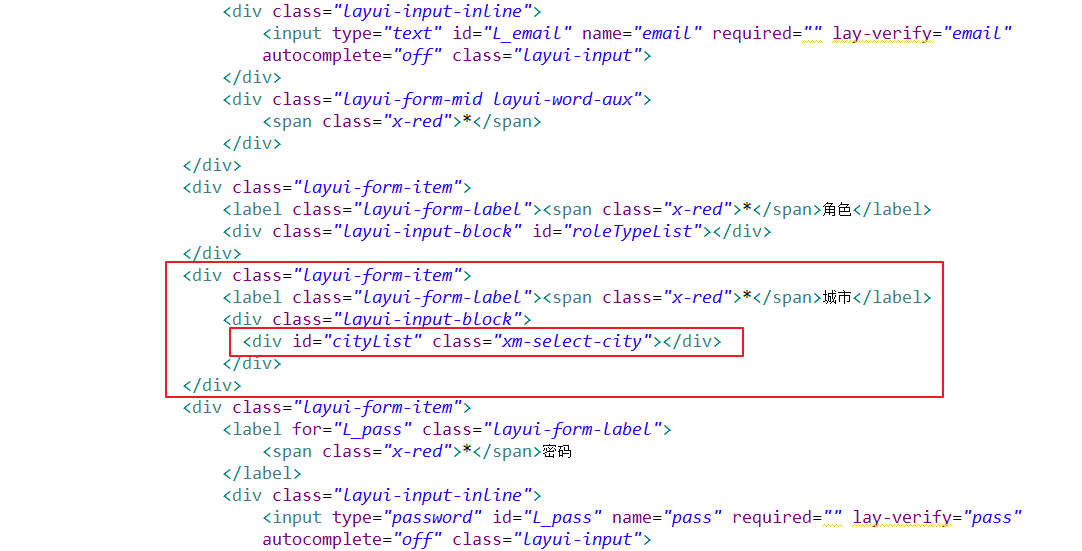
注意在页面中引入 xm-select 插件脚本:
1 | <script type="text/javascript" src="./js/xm-select.js"></script> |

js 脚本渲染:
1 | $.ajax({ |
后台数据响应文件位置:org.woodwhales.layui.controller.CityController.listAll()
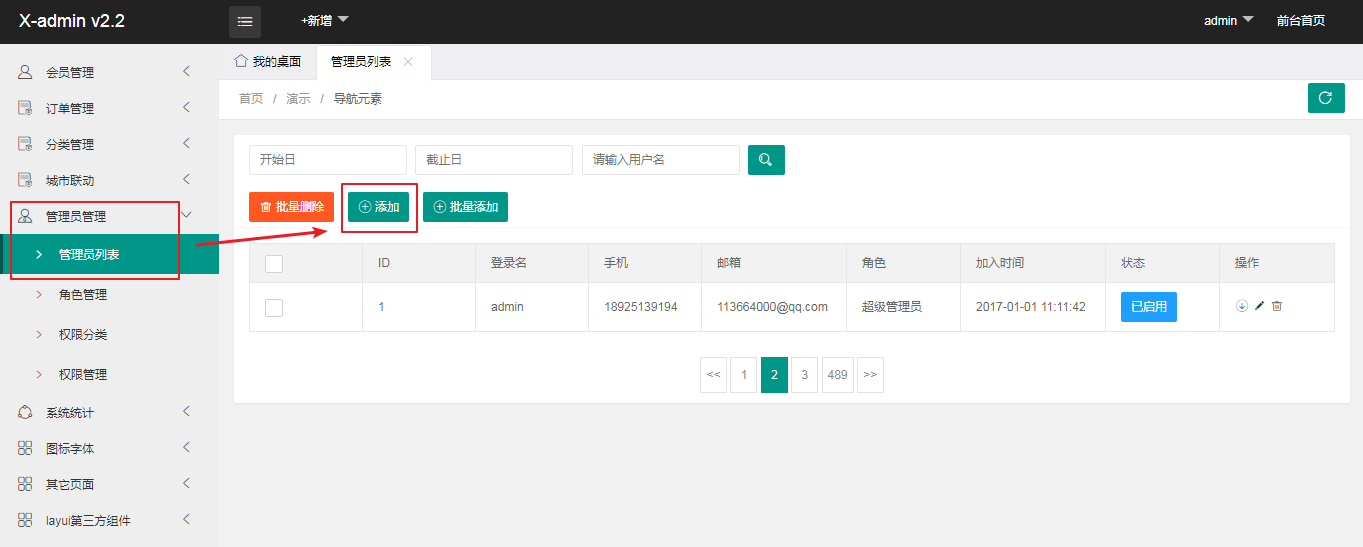
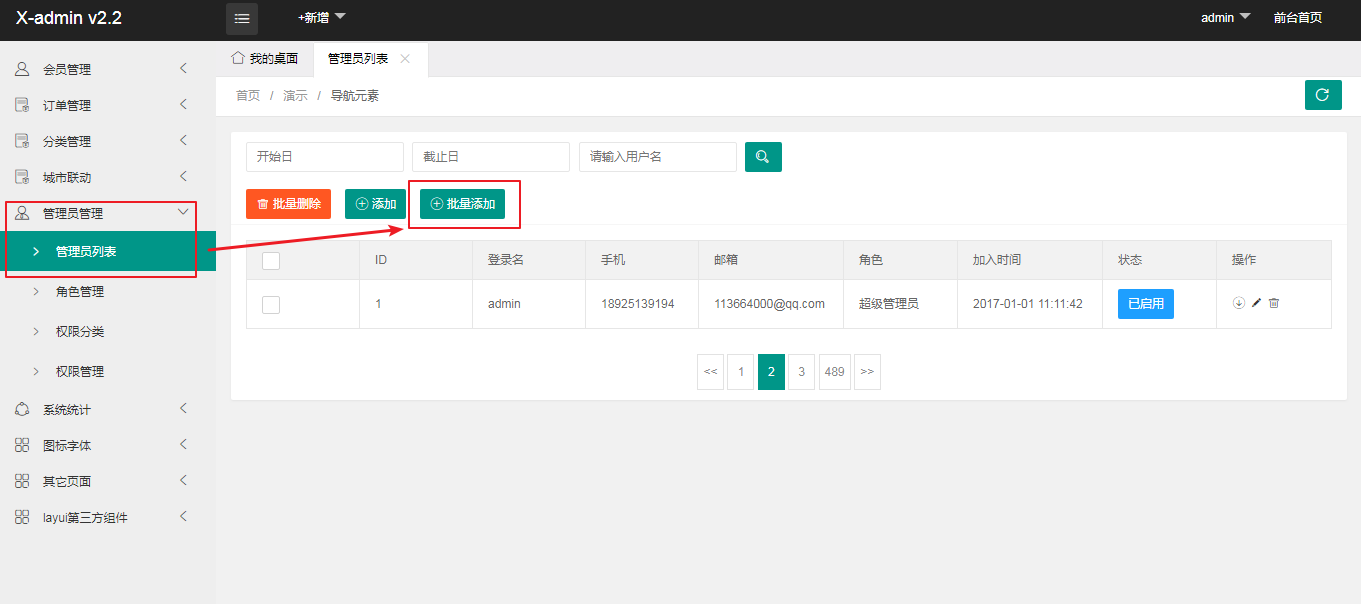
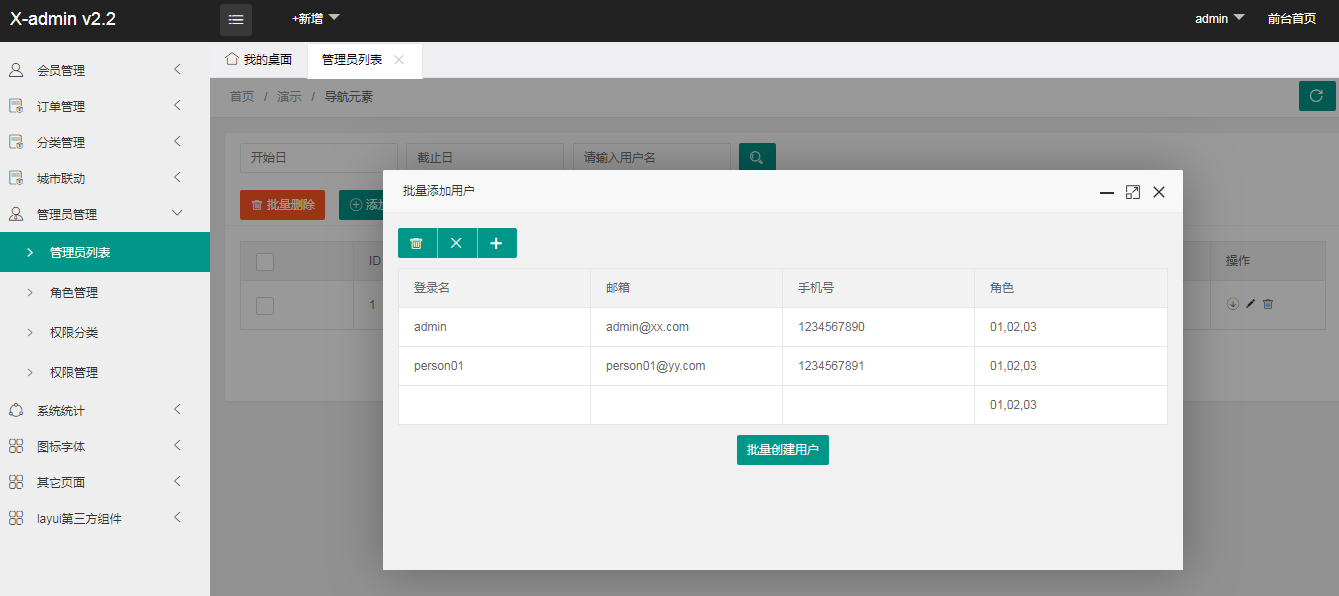
批量创建(批量提交)
本示例运行效果:
动态效果图:
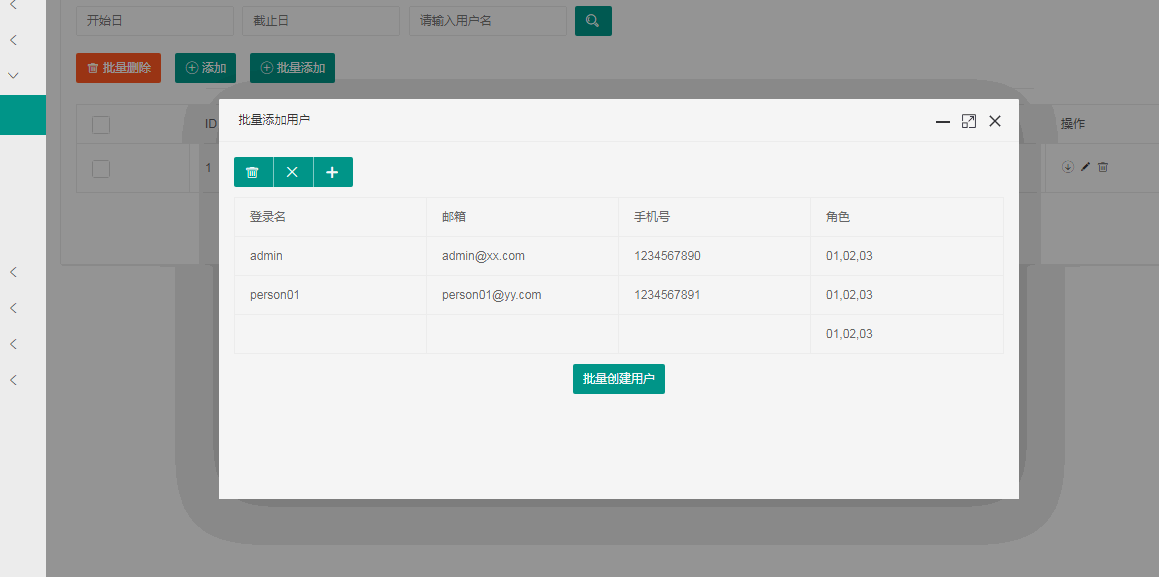
由于批量操作基本上是对“同一类”用户进行批量创建,因此他们的同一类是角色,因此点击“+”按钮的时候,新增的行会取前一行的角色的值。
批量提交之后,后台会将本批次提交的结果再响应回来,创建成功的记录有“userId”,创建失败的有失败原因提示。
html 页面位置:src/main/resources/templates/xadmin/admin-batch-add.html
在页面中定义一个表格 div:
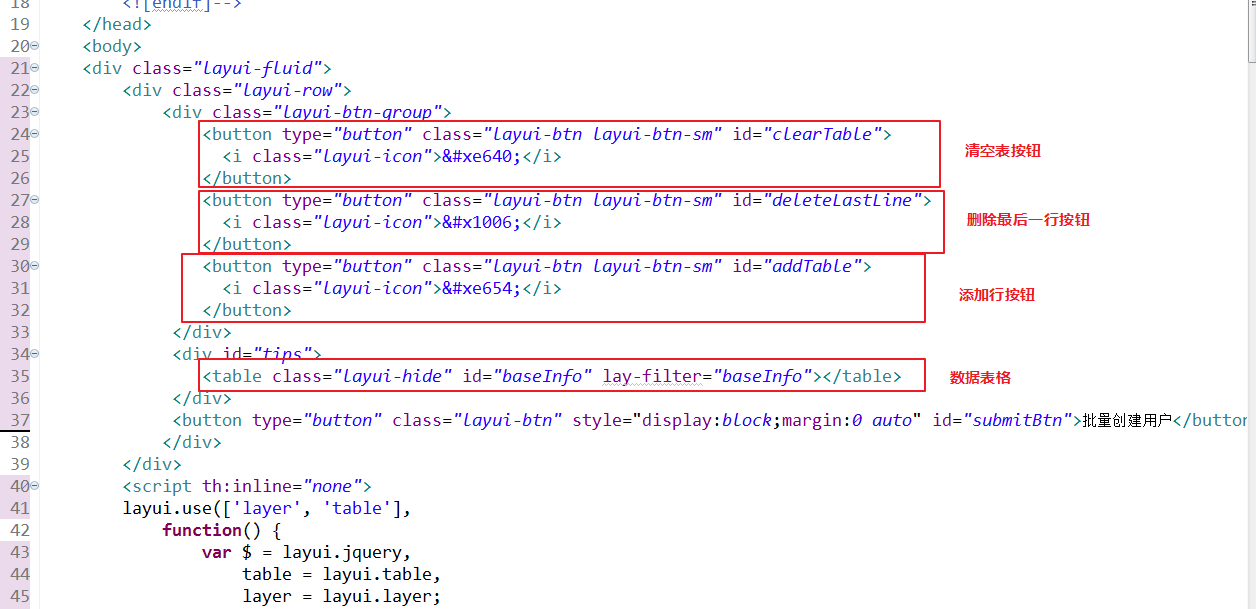
js 脚本控制:
1 | $("#addTable").click(function(){ |
另外,为了判断表格中的数据全部不允许为空,定义了判断字符串是否为空函数:
1 | function isEmpty(obj) { |
后台数据响应文件位置:org.woodwhales.layui.controller.UserController.batchCreate(BatchCreateRequestBody)
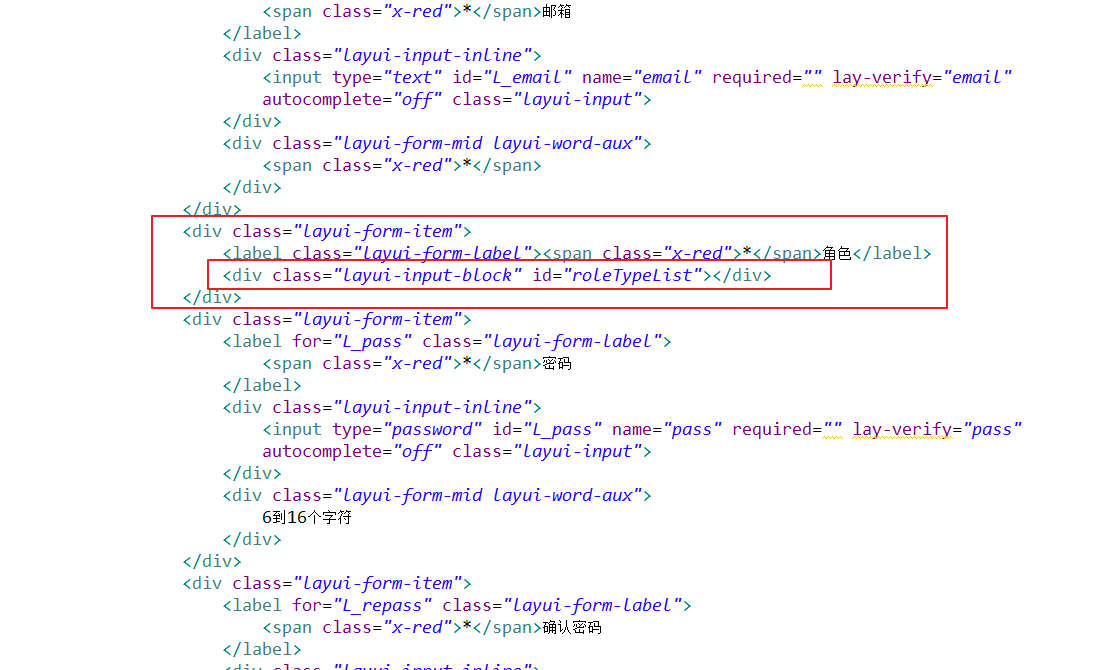
动态加载复选框
本示例运行效果:
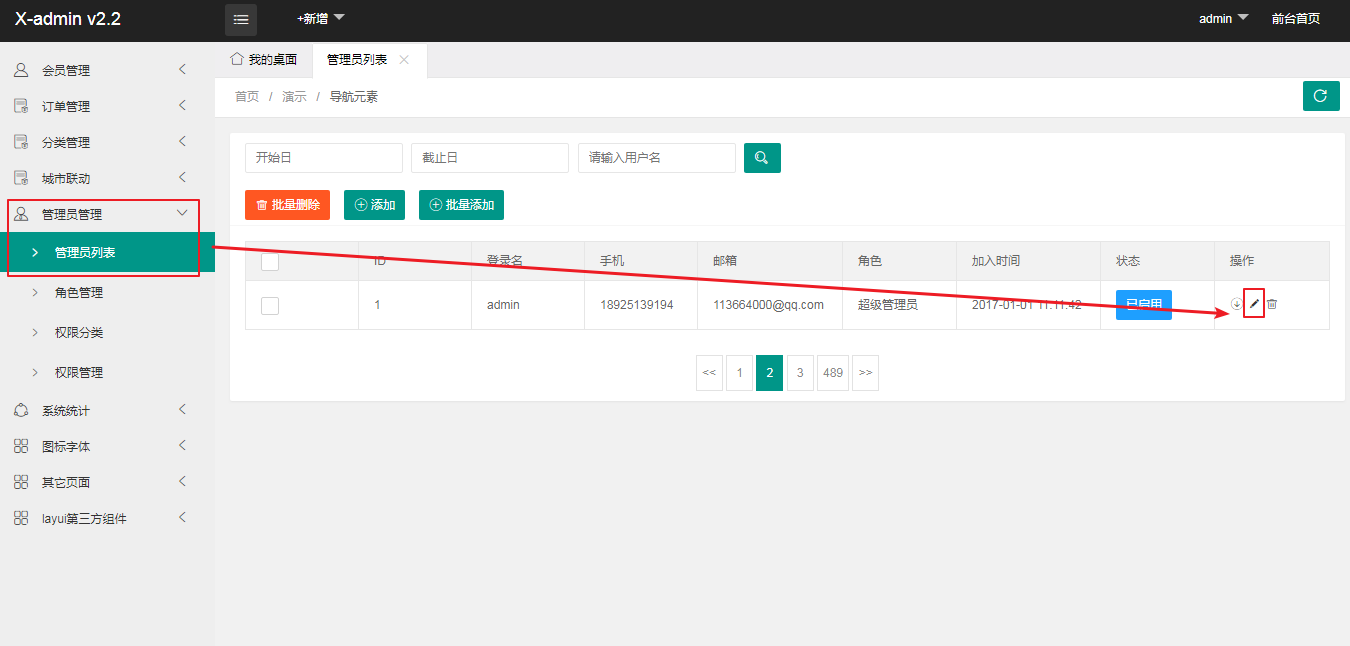
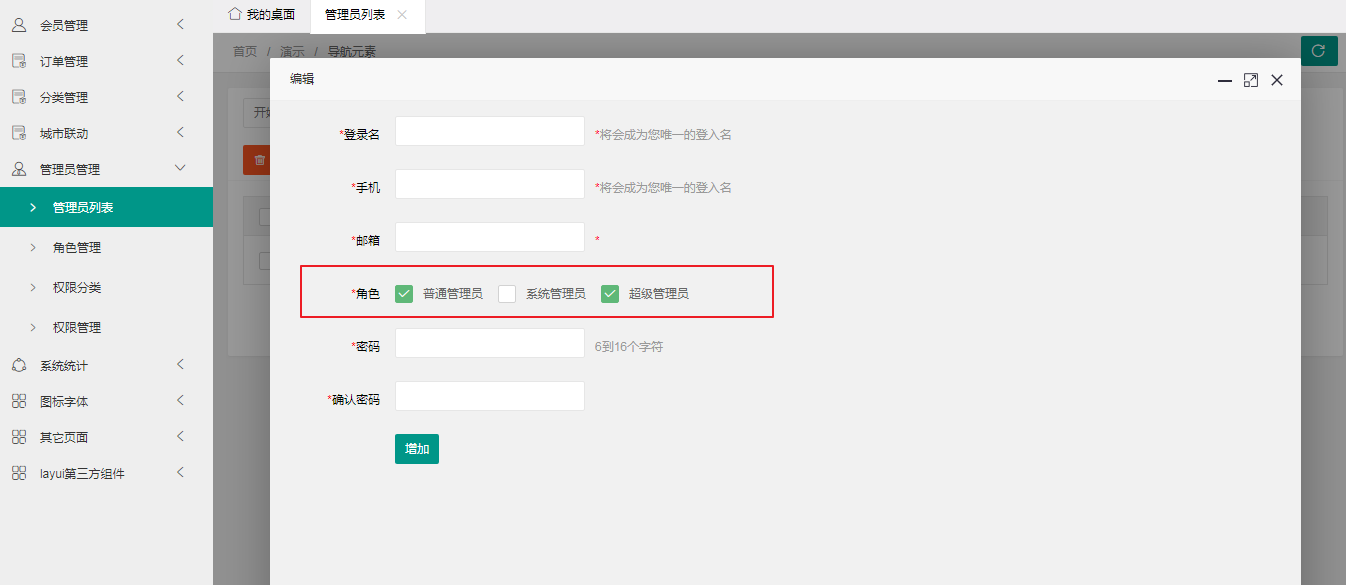
html 页面位置:/springboot-layui-tymeleaf-demo/src/main/resources/templates/xadmin/admin-edit.html
在页面中的“角色”字段位置增加自定义的复选框 div:
js 脚本渲染:
注意使用 jq 改变了原始 div 的元素属性,一定要记得刷新表单:form.render();
1 | $(function(){ |
后台数据响应文件位置:
角色类型数据字典:
org.woodwhales.layui.controller.RoleRTypeController.listAll()用户详情:
org.woodwhales.layui.controller.UserController.queryUserById(String)
源码 github 地址:springboot-layui-tymeleaf-demo